If you are looking to create a staging or development site - where you would like to be able to push file & database changes back to a live site then Softaculous also has a Staging facility that may be more appropriate than cloning for this purpose.
Cloning in Softaculous allows you to quickly make copies of your applications. It can also be used to alter those copies, for example:
A clone is a complete copy of the site - its files and its database - taken at the moment you run it. From that point the two are entirely separate: changes you make to one do not appear in the other, and there is no way to merge them back together later. If you want a copy you can work on and then push back to the live site, you want Staging rather than Clone.
To move a site from a sub-directory/folder to the web root - clone https://example.co.uk/mysite to https://example.co.uk.
With little work it can be used to help you switch from http:// to https:// (as long as you have the SSL certificate in place), for example:
Clone http://example.co.uk to https://clone.example.co.uk - remove the original site and then clone back from https://clone.example.co.uk to https://example.co.uk
In this article we are going to clone a WordPress site. Prior to starting this clone I have setup the sub-domainclone to receive the cloned site. You may also want to apply a LetsEncrypt SSL certificate to the clone domain to maintain HTTPS. This cloning process is similar for all other Softaculous managed applications.
You can only clone sites that are already managed within your local Softaculous Apps Installer. We have a separate guide on Importing a website into Softaculous.
Take a backup before you start, and clone into an empty directory. Cloning into a folder that already contains a website risks overwriting it.
Be especially careful with the second example above: it deletes your live site before cloning back over the top of it, so if anything goes wrong at the final step you have no original left to fall back on. Check the clone works properly before you remove anything.
Before you start - a note on plugin files
Softaculous copies your site's files and database, but some plugins keep configuration in files that sit outside the normal WordPress structure - WordFence, for example, uses .user.ini and wordfence-waf.php. Those can be left behind.
If a cloned site comes up with an error or a blank white screen, a missing file of this kind is a likely cause. Compare the two installations in the File Manager and copy anything the clone is missing.
Creating the Clone site
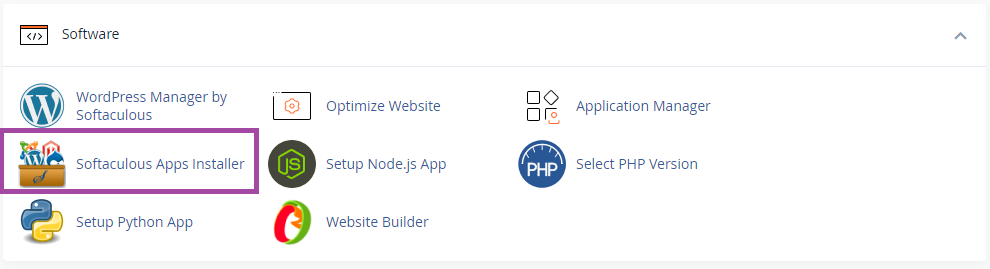
Open the Softaculous Apps Installer from the Software section of cPanel
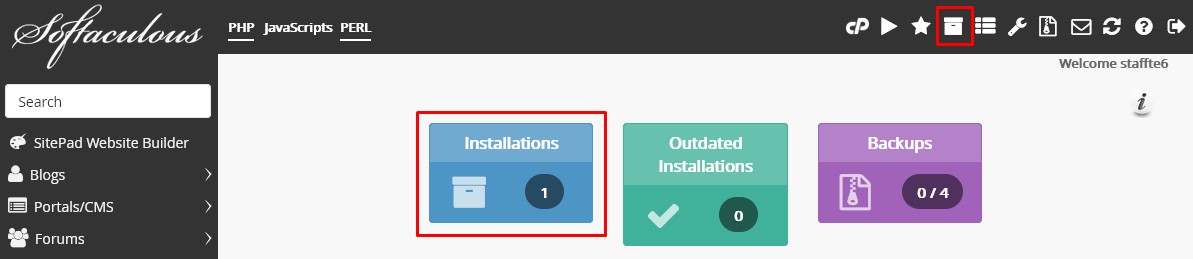
Click the All Installations icon in the top toolbar, or open the application and click My Apps.
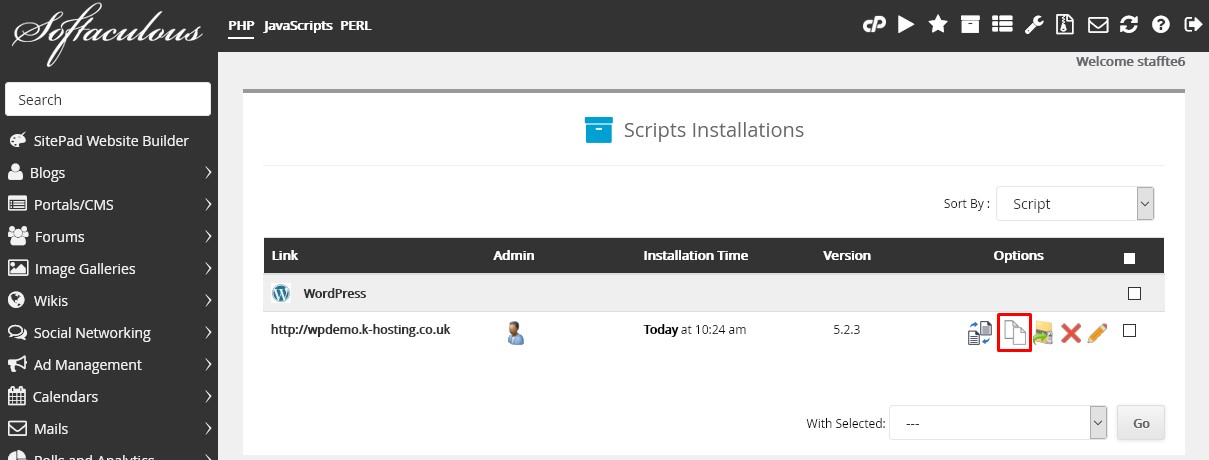
From your installed applications list, click the Clone icon next to the site you'd like to work with.
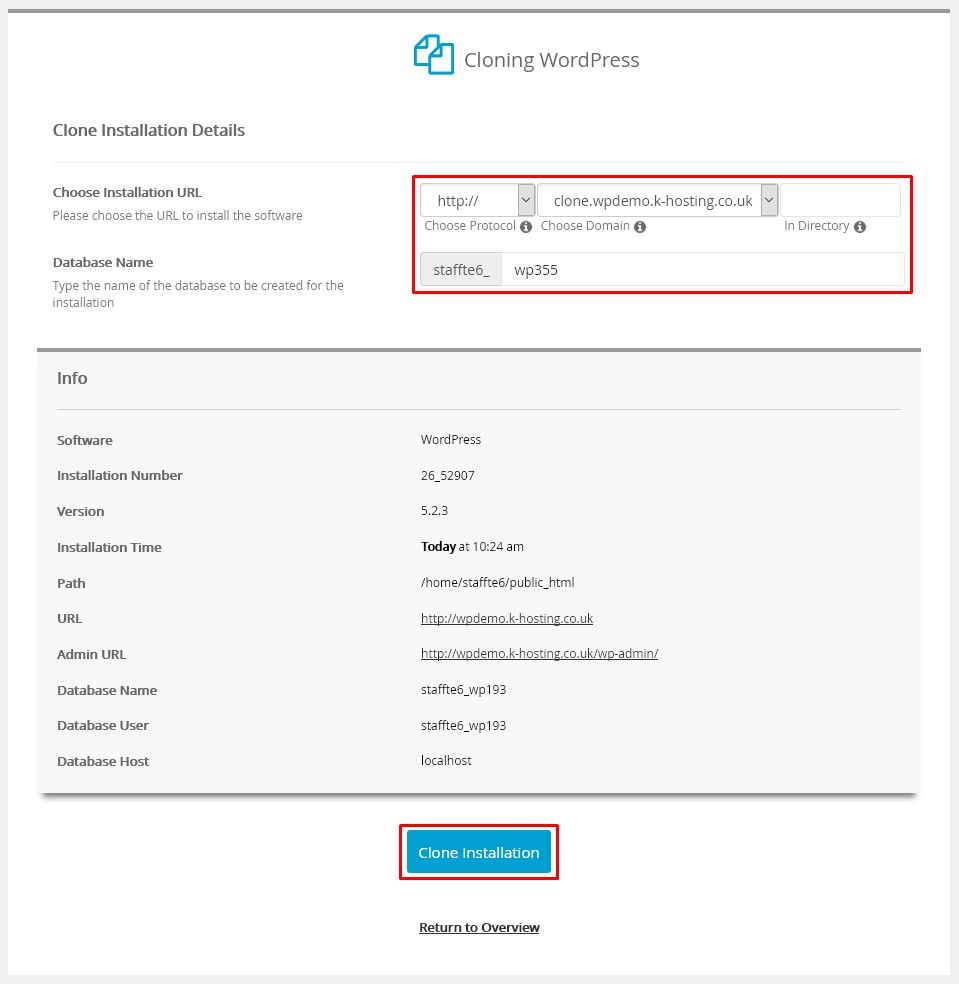
Fill in Choose Installation URL - the protocol, the domain, and optionally a directory. Leave the directory blank to clone to the root of that domain. Database Name is filled in for you and can be changed if you prefer.
Under Site Settings, tick Disable Search Engine Visibility. This matters more than it looks. Without it your clone is a second, publicly reachable copy of your website, and search engines will happily index it alongside the original. Leave it ticked until the copy is either taken down or has replaced the original.
Click Clone Installation to start. The Info panel at the bottom of the page shows the site you are copying from, so it is worth a glance before you commit.
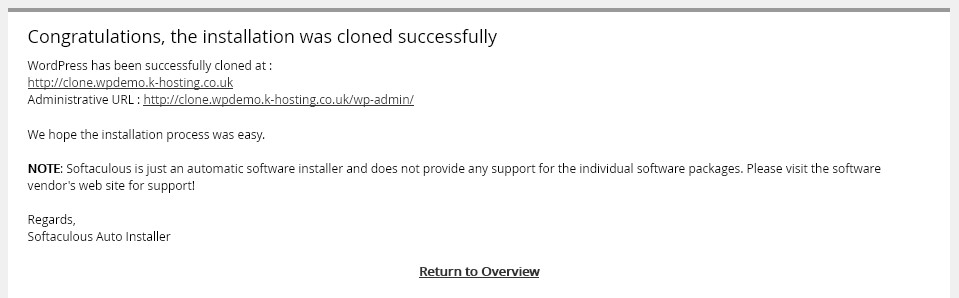
You'll see a success notice once the clone has completed.Click Return to Overview to get back to the WordPress installations dashboard.
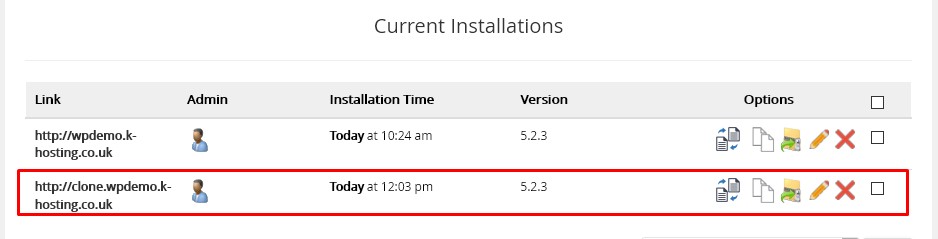
You'll see the newly cloned site under Current Installations.- The URL under the Link column will take you to the site homepage (if you've updated your DNS). See our article on viewing your website before updating DNS to test the new site. - The person icon under the Admin column is a one-click link to the WordPress admin dashboard - you will be automatically logged in.