Onyx WordPress site importer - Importing a site using SSH
Onyx offers several options to import your site. This guide walks you through importing a WordPress site in to an existing Onyx WordPress site. This will import all files and the WordPress database.
If you would prefer to import a WordPress site from a cPanel account to a new Onyx site, we have a separate guide on using the KARMA Onyx export tool.
Mailbox Migrations
This process will only move your site files and databases.
If you wish you migrate your emails into your Onyx Mail account, you can use our KARMA Import Email tool to sync mailboxes (external link to Krystal guide opens in a new window).
Accessing the Import tool
- Log in to your Onyx Portal
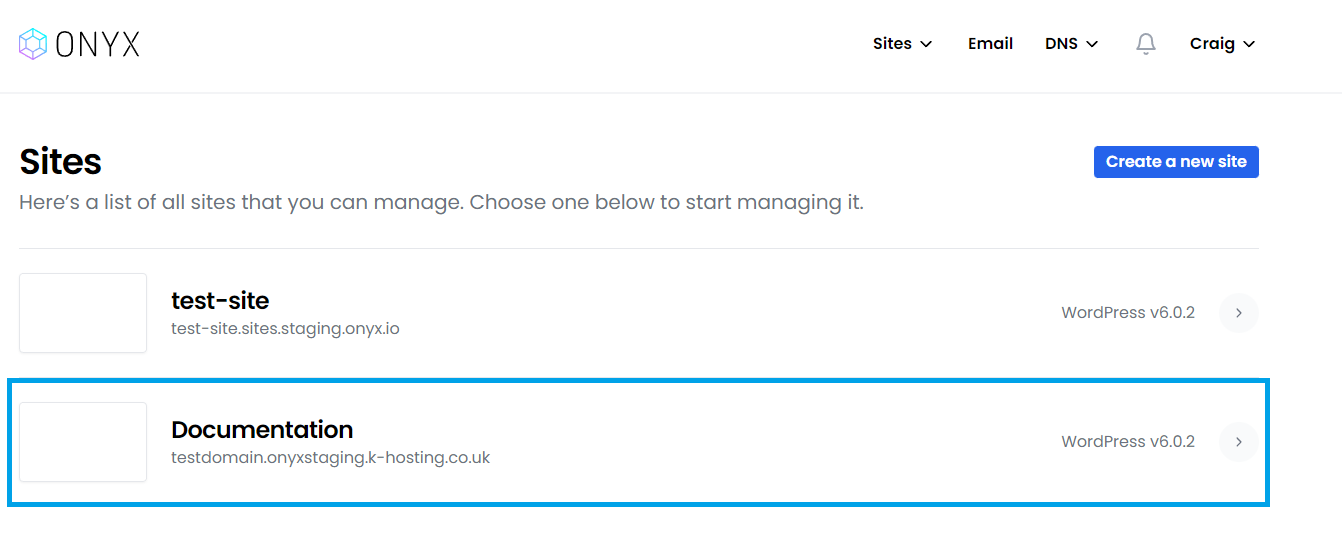
- Select the site you wish to import to.

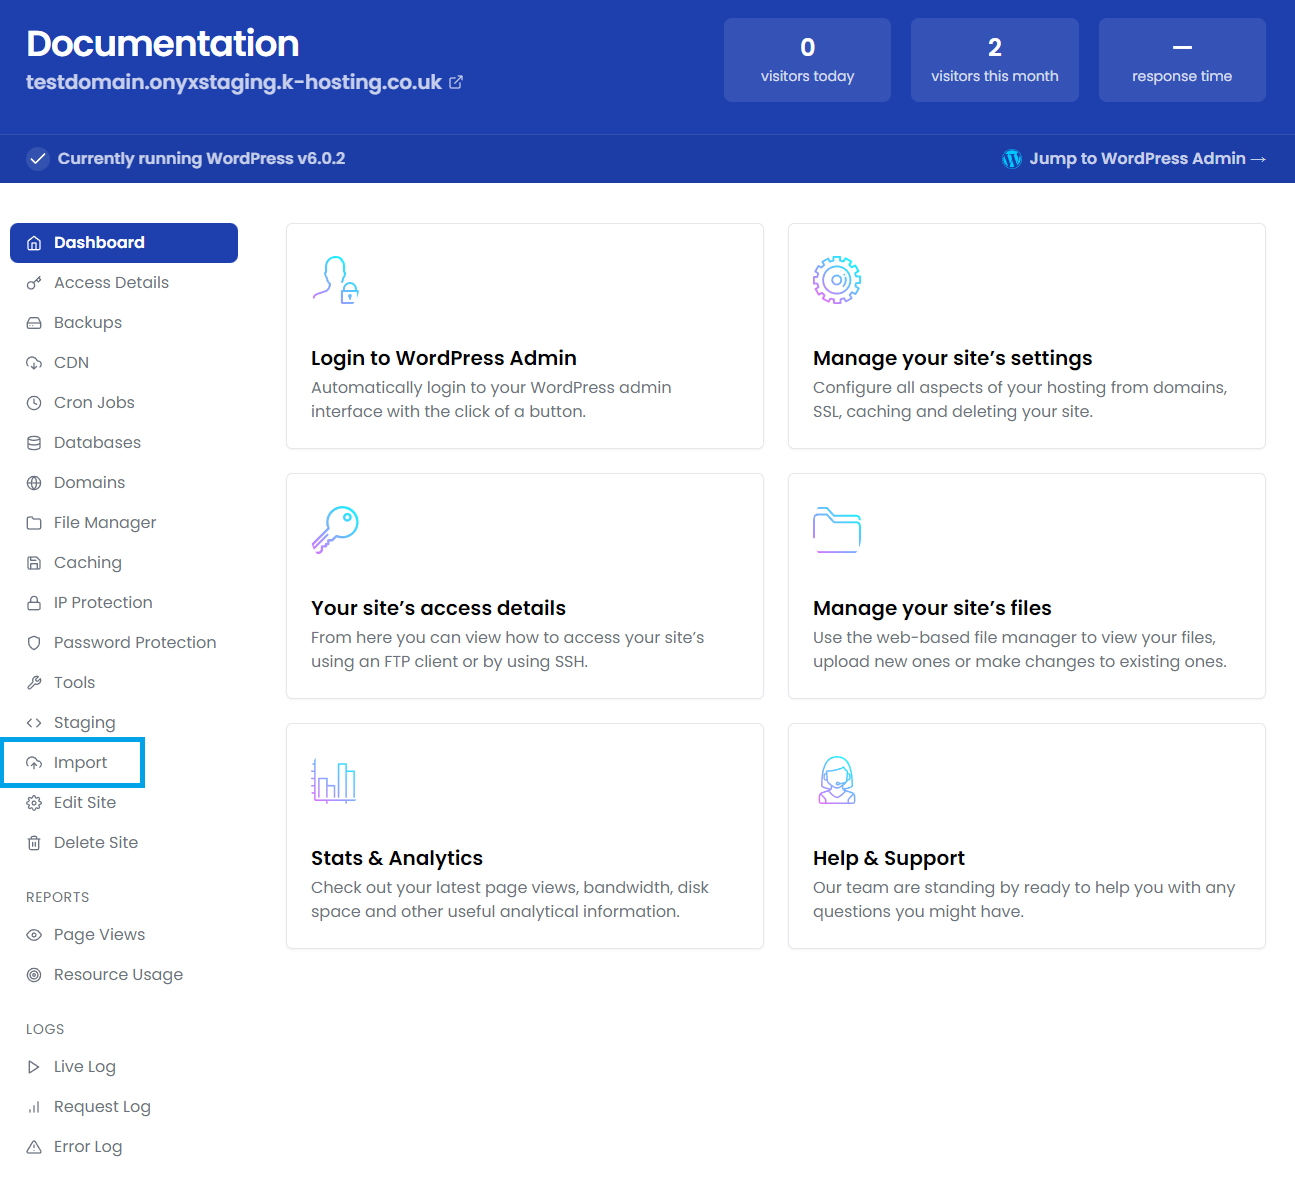
- From the sites Dashboard select Import from the left hand menu.

Using an SSH Key in cPanel
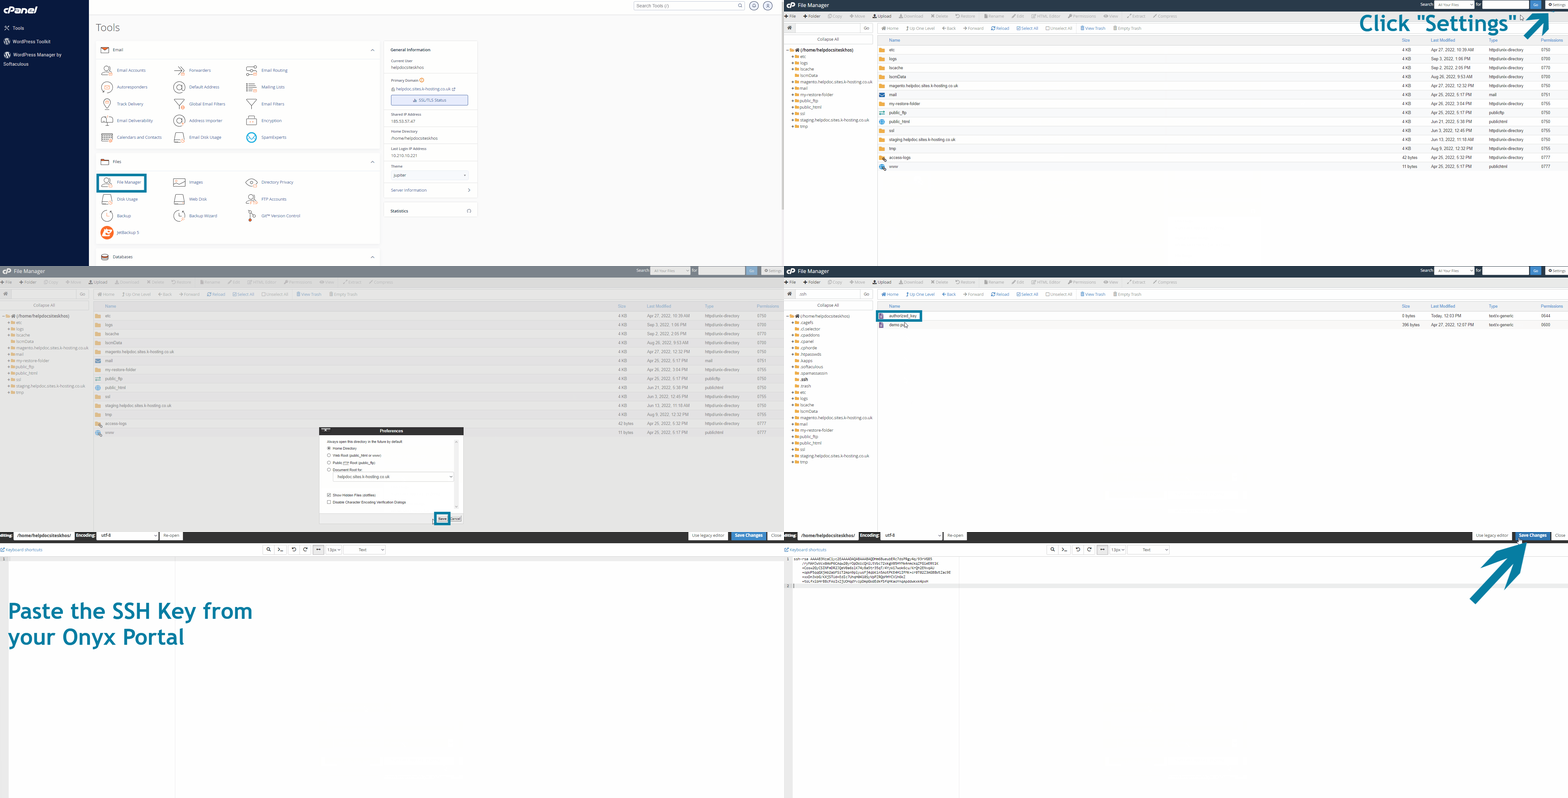
The GIF below covers the steps to add your SSH key to cPanel.
The steps involved are specific to cPanel and will vary with other control panel providers, however, the ssh key provided within your Onyx dashboard will always go into ~/.ssh/authorized_key.

- Log Into cPanel
- Navigate to the "File Manager" option
- Click Settings in the top right corner
- Ensure that "Show Hidden Files (dotfiles)" is ticked
- Click "Save"
- Navigate to the ".ssh" directory
- Right click the "
authorized_keys" file.
- Paste the SSH key from your Onyx Dashboard into the file.
- Save!
Completing an import
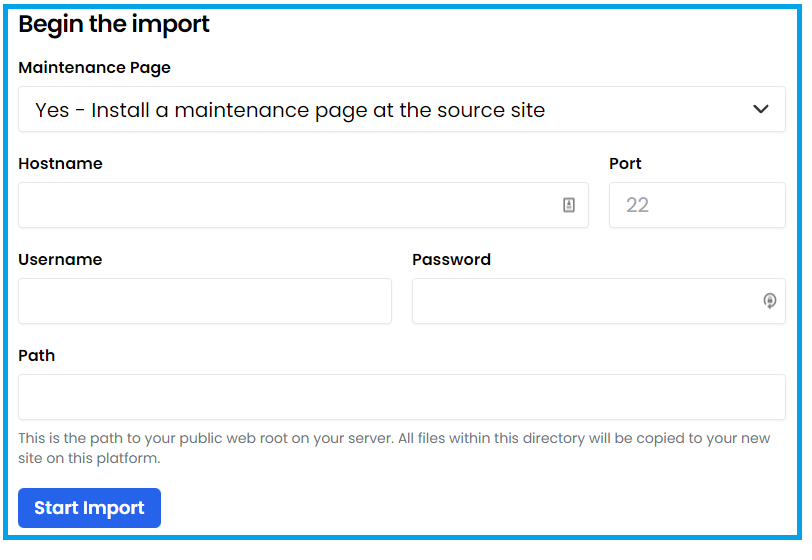
Complete the following details:

- Maintenance page - select to either enable Maintenance Mode on the source site (Yes) or leave it running as normal (No).
- Hostname - enter the source server hostname.
- Port - enter the source servers SSH port.
- Username - enter the SSH login username.
- Password - enter the SSH login password (leave blank if you have authorised the Onyx SSH key on the source server).
- Path - enter the path to the sites public web root (docroot).
- Click Start import to continue. Once the progress bar shows complete your site imported is finished.

