Onyx Mail server migration - Updating your settings
 Updated 8 months ago
by
Tristan Payne
Updated 8 months ago
by
Tristan Payne
We’re upgrading the infrastructure that powers Onyx Mail. This means all accounts currently hosted on mail01.onyx.io will be moved to a new, faster, and more reliable server: aleen.krystal.uk.
Why is the server changing?
The current mail server (mail01.onyx.io) has reached the end of its life and will be retired. Migrating to aleen.krystal.uk provides a more modern platform with improved performance, reliability, and upgrade options such as higher storage limits and enhanced security.
What do I need to do?
Once the migration is complete you’ll need to update your DNS and email client settings:
- MX records will update automatically.
- You’ll need to update your DNS record for
mail.YOURDOMAIN.HERE. - Then, update your mail client to use
mail.YOURDOMAIN.HEREas both the incoming and outgoing mail server.
How to update your mail. A record
Step 1 – Log in to Onyx
Follow this guide to access your Onyx dashboard: How to log in to Onyx via your Krystal client area
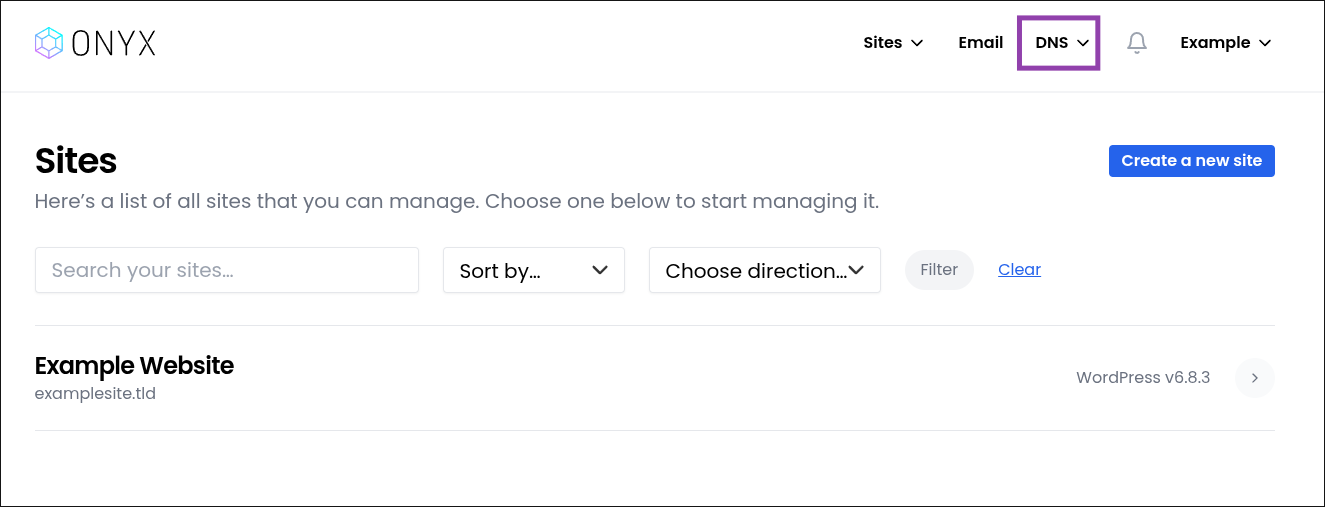
Step 2 – Open the DNS Manager
Open the Domains & DNS tab and click DNS Manager.
Guide: How to enable the Onyx DNS tool
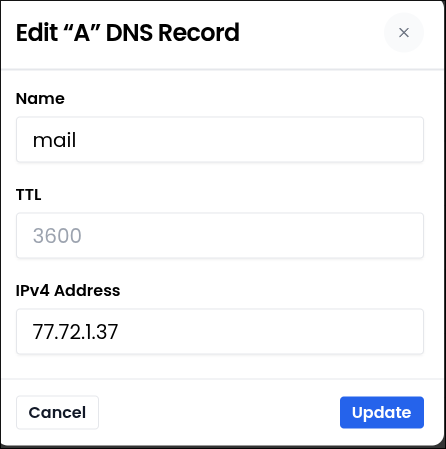
Step 3 – Create or Edit the Mail Record
Create an A record:
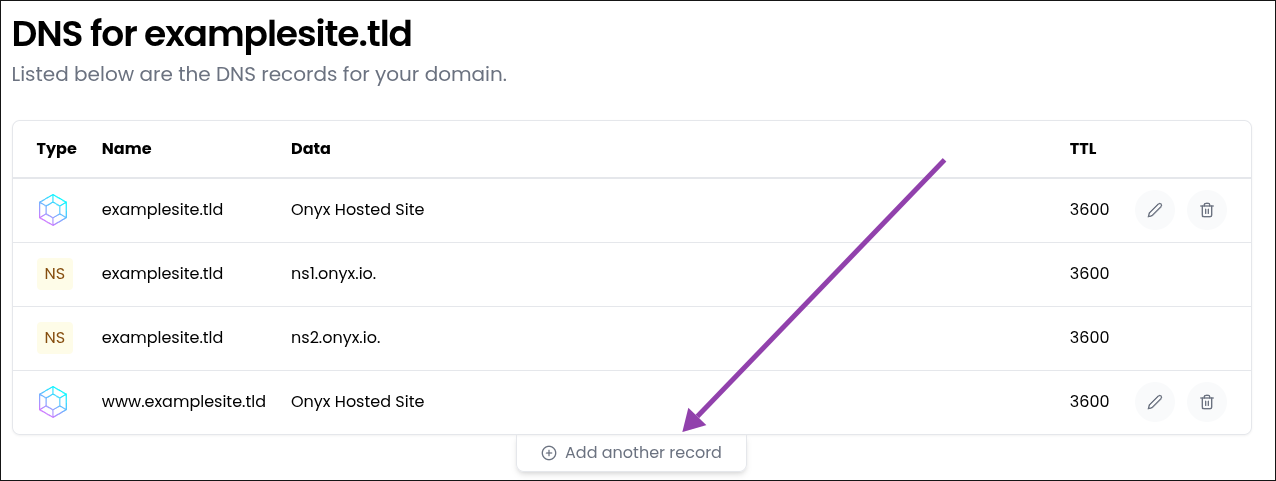
Click "Add another record" to create the following A record for your mail subdomain:
- Record type: A
- Name: mail
- Value: 77.72.1.37
- TTL: Leave default (typically 3600)
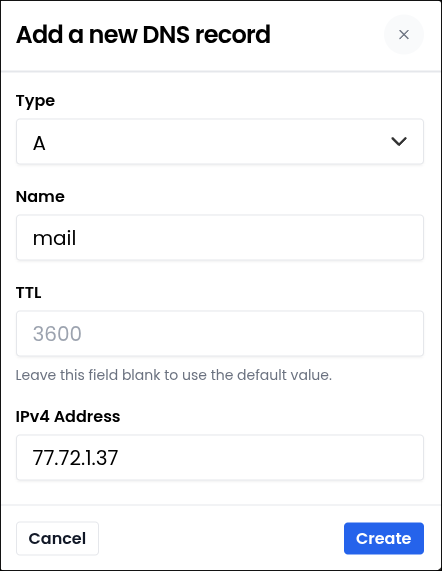
Once saved, changes can take up to an hour to propagate.
Edit an A record:
If you already have a mail A record, you can edit your existing mail record by clicking the "Edit" button
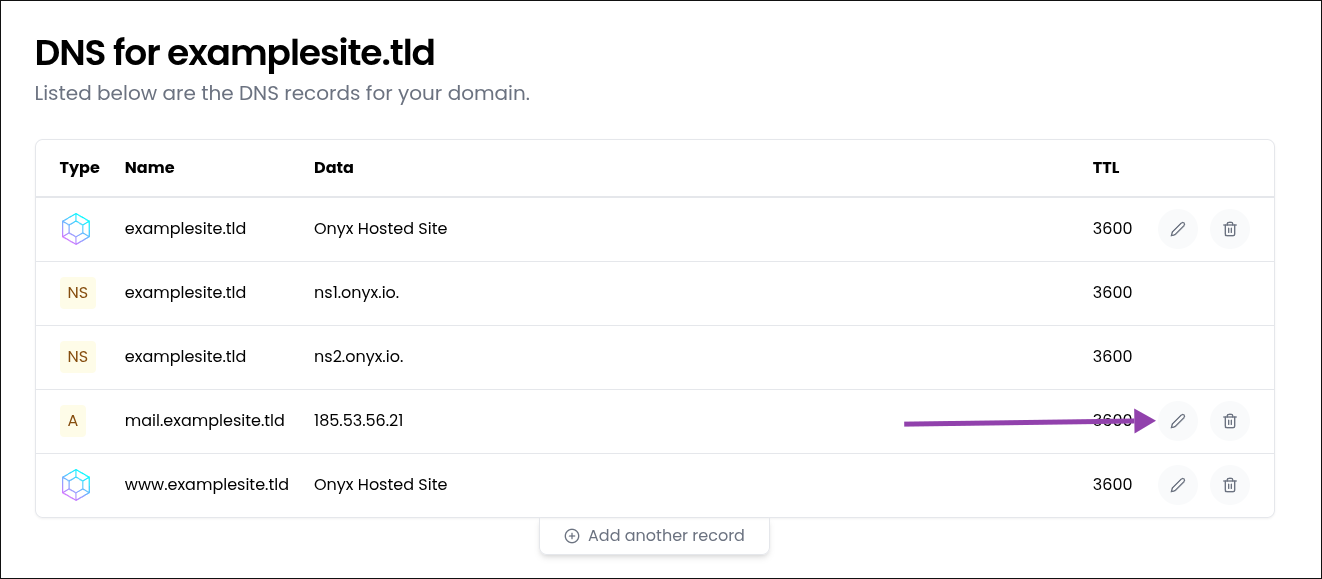
Then you can modify the A record for your mail subdomain:
- Record type: A
- Name: mail
- Value: 77.72.1.37
- TTL: Leave default (typically 3600)
Updating your mail client settings
After DNS changes have propagated, you’ll need to update your mail client to connect to mail.YOURDOMAIN.HERE instead of mail01.onyx.io.
Updating your Mac Mail Client
- Open Mail and go to Mail > Settings.
- Click the Accounts tab.
- Select your account from the sidebar.
- Under Server Settings, update both:
- Incoming Mail Server:
mail.YOURDOMAIN.HERE - Outgoing Mail Server (SMTP):
mail.YOURDOMAIN.HERE
- Incoming Mail Server:
- Click Save.
Updating Outlook (Desktop)
- Open Outlook.
- Go to File > Account Settings > Account Settings...
- Select your account and click Change.
- Update both servers:
- Incoming Mail Server:
mail.YOURDOMAIN.HERE - Outgoing Mail Server (SMTP):
mail.YOURDOMAIN.HERE
- Incoming Mail Server:
- Click Next, then Finish.
Updating Thunderbird
- Open Thunderbird.
- Go to Account Settings.
- Under your account, select Server Settings.
- Change Server Name to
mail.YOURDOMAIN.HERE. - Select Outgoing Server (SMTP).
- Edit your SMTP entry and update Server Name to
mail.YOURDOMAIN.HERE. - Click OK or Save.
Updating iOS Mail (iPhone / iPad)
- Open Settings > Mail > Accounts.
- Tap your email account.
- Tap Account again.
- Update both:
- Host Name (Incoming):
mail.YOURDOMAIN.HERE - Host Name (Outgoing):
mail.YOURDOMAIN.HERE
- Host Name (Incoming):
- Tap Done.
Updating Outlook (Mobile)
- Open the Outlook app.
- Tap your Profile icon, then Settings (⚙️).
- Select your email account.
- Tap Advanced Settings (if available).
- Update both incoming and outgoing mail servers to
mail.YOURDOMAIN.HERE. - Tap Save, then restart the app.
Need help?
If you run into any issues, our support team will be happy to assist.