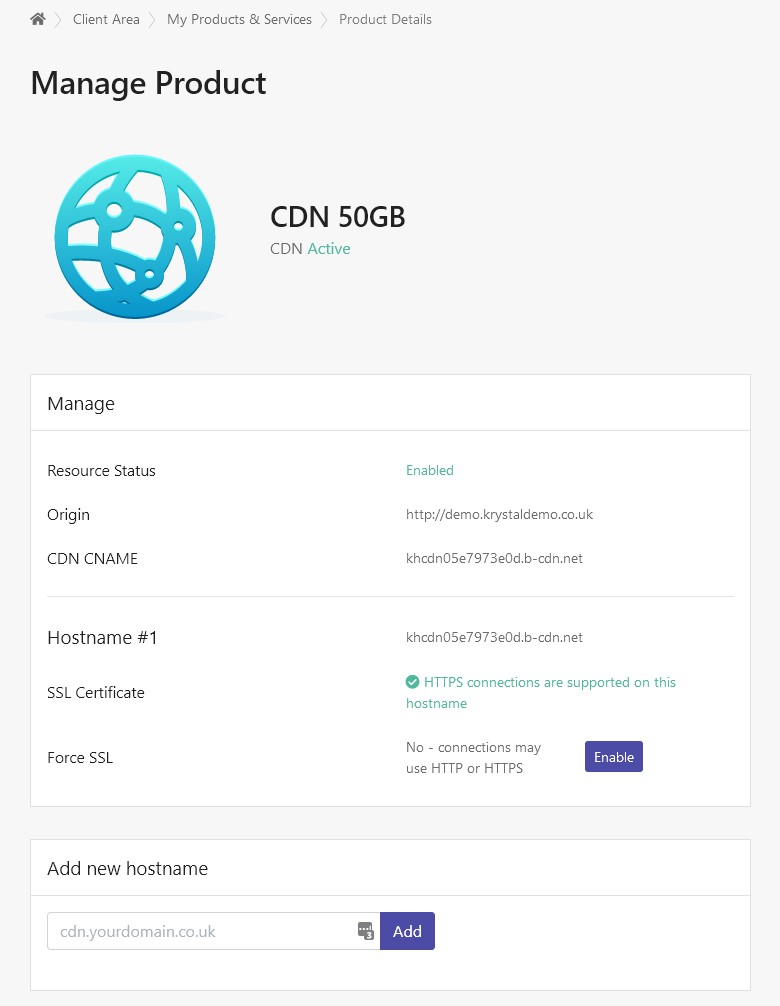
When you initially purchase your CDN it will come with a default hostname (Hostname #1):
In this example khcdn05e7973e0d.b-cdn.net
If you're happy to use this as the URL from which your static content will be served you can continue to configure your website to use your new CDN.
We recommend that you Enable Force SSL - you can do this by clicking the Enable button next in the Hostname #1 section.
Custom Hostname
You might decide you'd prefer to have your CDN serve content from a more friendly hostname.
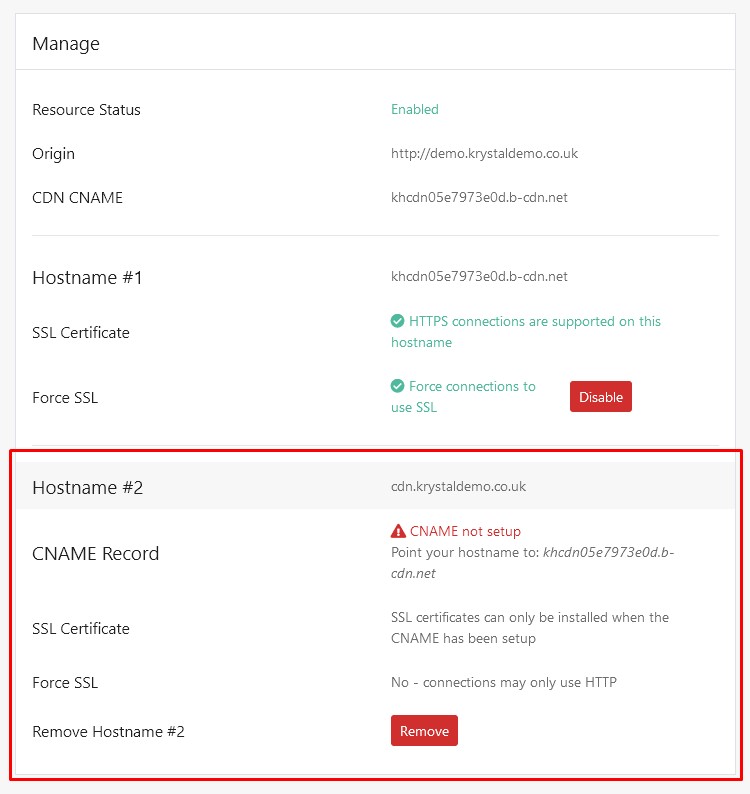
You have the option to add a custom hostname e.g. cdn.krystaldemo.co.uk
Type the hostname you'd like to use in the Add new hostname box and click Add.
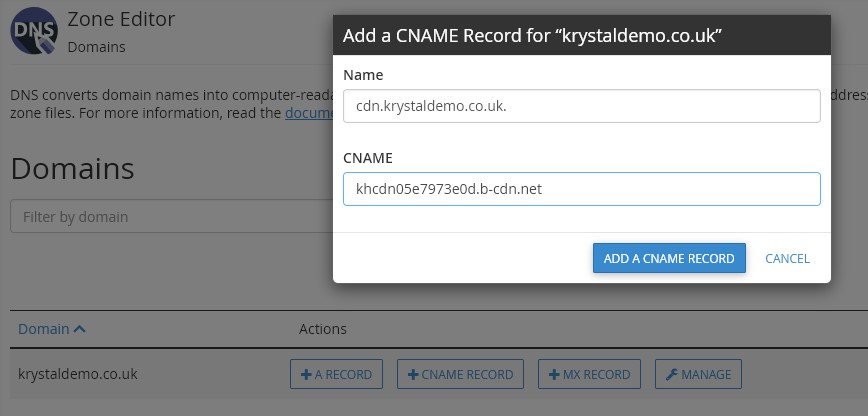
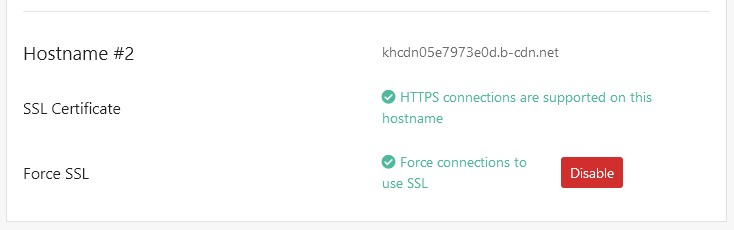
You'll see your custom hostname appear as Hostname #2.You'll also see a notice that the CNAME is not setup. You'll not be able to use this custom name, or enable SSL or Force SSL until this is added. Use the details shown to add a CNAME record.
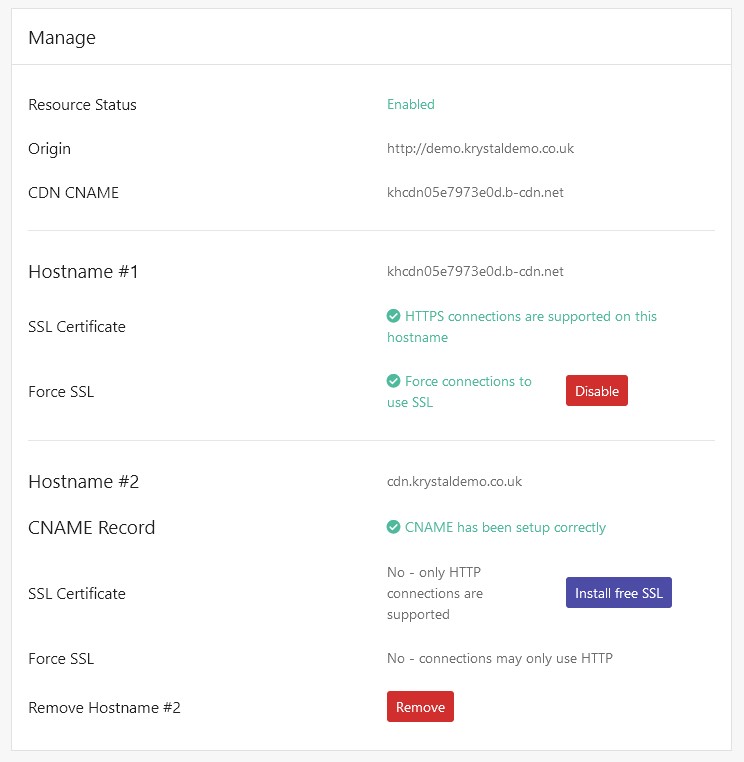
Once you've added the CNAME you can refresh your browser, or revisit the Manage CDN page and you should see the green CNAME has been setup correctly message.
Click Install Free SSL to add SSL to this hostname:This adds both an SSL certificate and enables Force SSL.
Your custom hostname is now ready to use.
We have separate guides on configuring your site to use your CDN.