How to configure WordPress to use a CDN

This guide assumes you've purchased a Krystal CDN and if required set up a custom hostname.
This guide shows the CDN set up as a custom hostname. If you've not followed our guide to set up a custom hostname you should use the default CDN name ending b-cdn.net.
It also assumes that you're WordPress site is using the LiteSpeed caching plugin.
It's also important that you've fully optimised your site before adding the CDN. We have a separate guide on optimising your WordPress site and we strongly advise running through that first - many of the tips also apply to sites not running WordPress, or using a different CDN.
- From within your WordPress dashboard select, LiteSpeed Cache > Settings.

- Click Show Advanced Options to show the CDN tab.

- Toggle the Enable CDN slider to On
Enter the CDN URL (the hostname you set up) including the initialhttps://
Enter the site's Original URL, prefixed by// - By default, the CDN will cache Images, CSS and JS.
You can alter what is cached to suite your specific requirements - adding or removing files, including directories or excluding paths. - Click the Save Changes button at the top or bottom once you've entered all the required details.
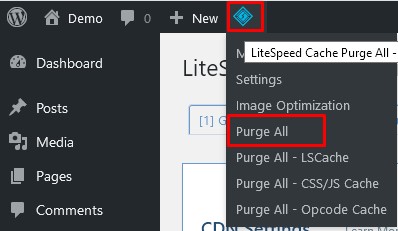
- Purge your site's LiteSpeed cache - hover over the LiteSpeed icon in the WordPress Admin bar and select Purge All from the menu that appears.
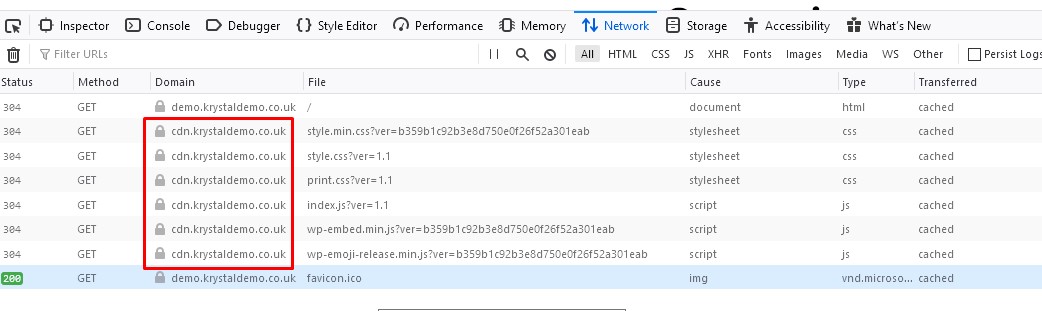
- You should now be able to visit your site and see the selected resources being served from the CDN in your browser console.