Managing sub-user accounts
 Updated 4 months ago
by
Tristan Payne
Updated 4 months ago
by
Tristan Payne
There may be times when you would like to allow access, through Onyx, to one, or more sites.
For this reason, Onyx supports the adding of additional users to chosen sites.
Some uses of this feature might be:
- Giving administrator access to a site and all it's Onyx settings to a developer
- An agency giving a client full access to their sites through Onyx
- An agency giving permissions to specific site to a member of staff
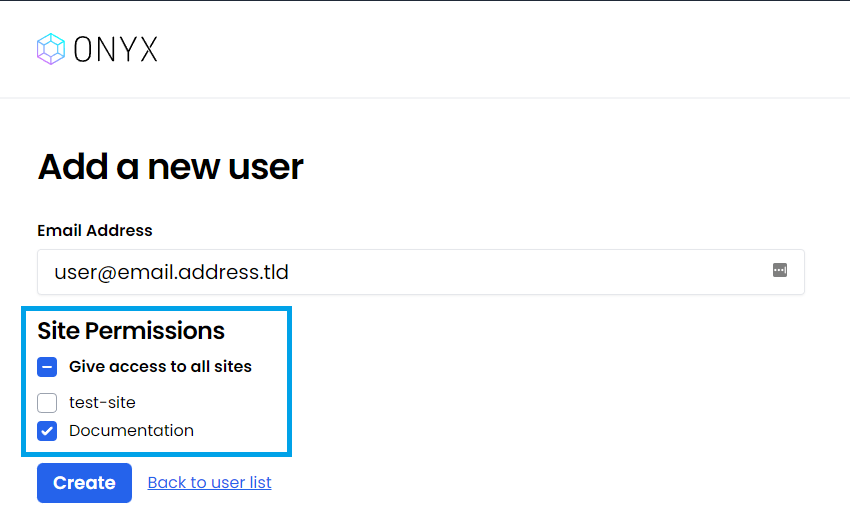
When you setup another user in your Onyx account all you will have to do is provide their email address and select which site(s) they are permitted access.
When you add a new user, they will automatically receive an email with the final steps for account creation.
If the user already has Onyx sites under that email address then they can sign-in as normal and select the newly allocated sites from their portal. If this is their first Onyx site then will be asked to setup a password prior to being able to access the sites.
Logging in to a Sub-Account
Sub-account users should sign-in to the Onyx Portal at https://portal.onyx.io/login.
Sub Account users cannot use the standard Onyx.io/login page.
Accessing Sub-Accounts via your Onyx Dashboard
Any new Onyx user accounts you create will have Administrator level access to the WordPress sites you assign to them.
This process may not be appropriate if, for example, you simply wish to add an Author or Editor - in cases such as this, you should create new WordPress users within the specific site and assign the appropriate role/permission there.
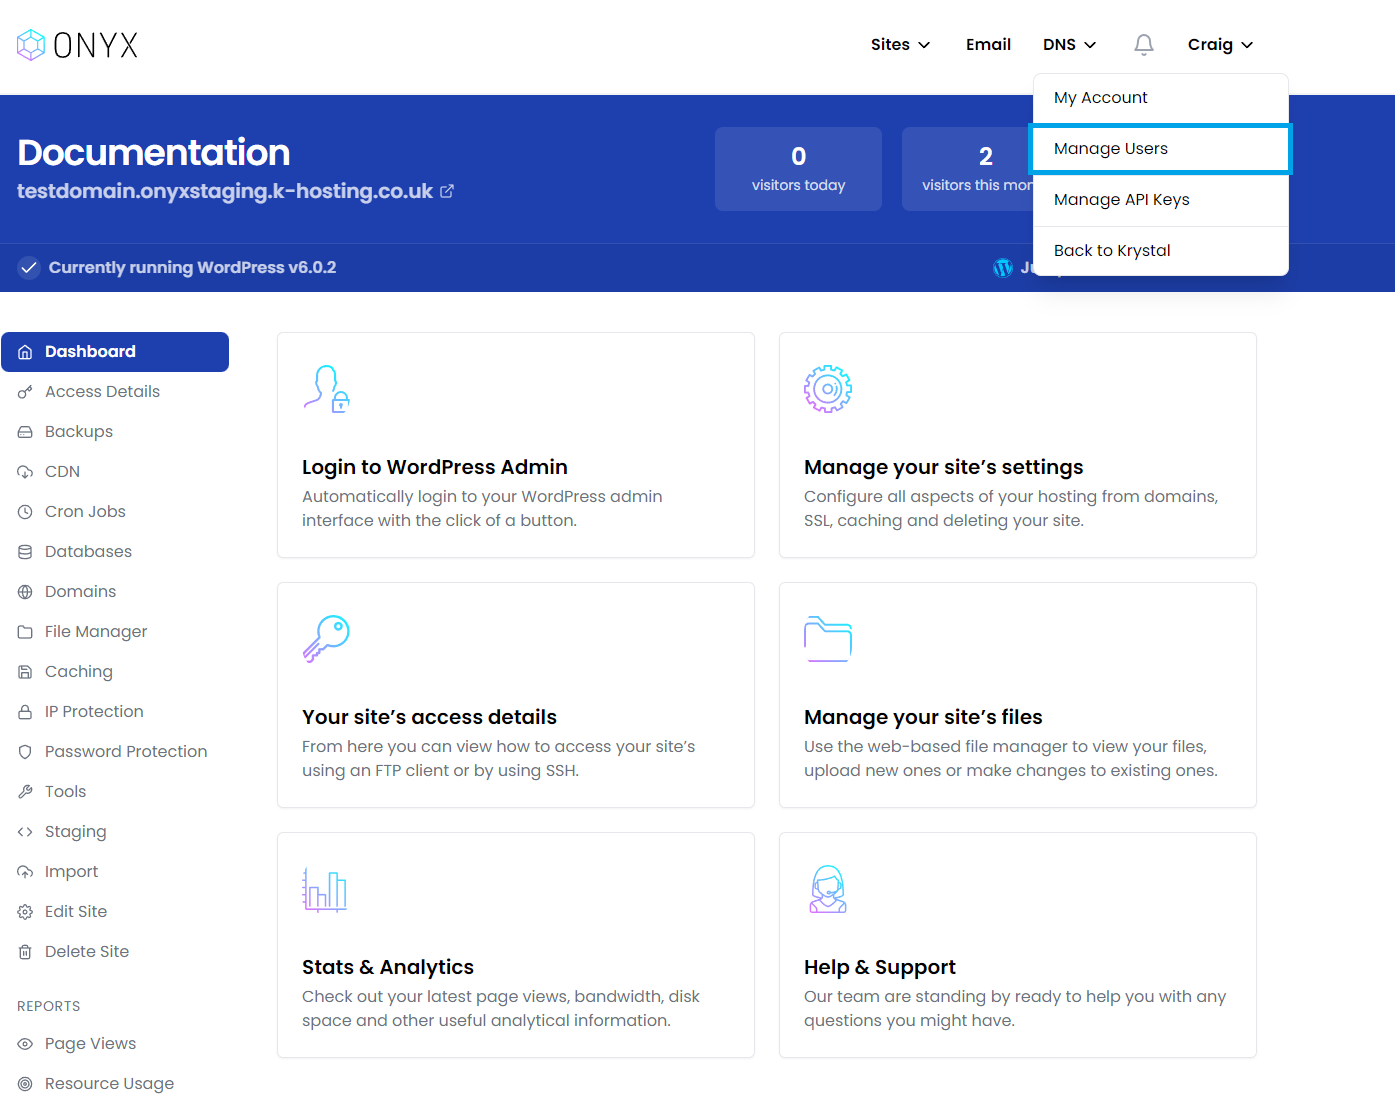
- Log in to your Onyx Dashboard
- Click on your name to open the management dropdown.
- Select Manage Users.
- Select Create your first user

- Enter a valid email address for the user
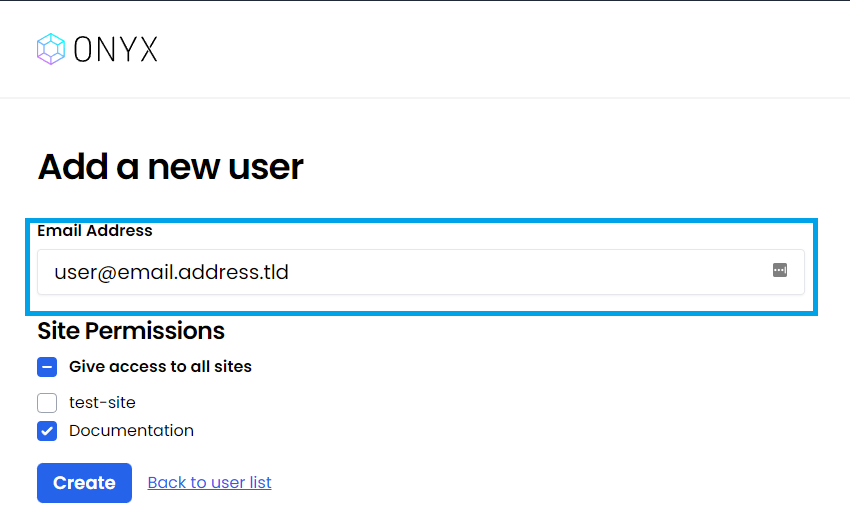
- Select the site(s) they should have access to
- Click Create to complete the user account creation.
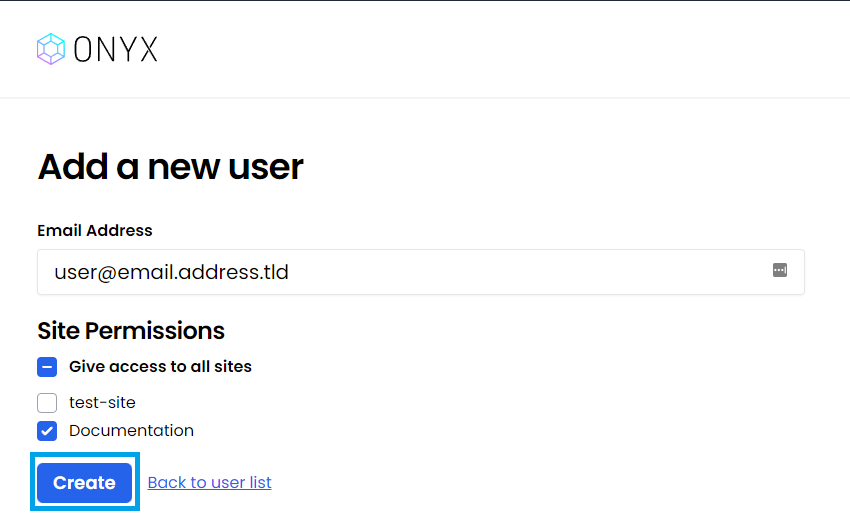
- That’s it! The new user has been created and will now receive an email with their next steps.
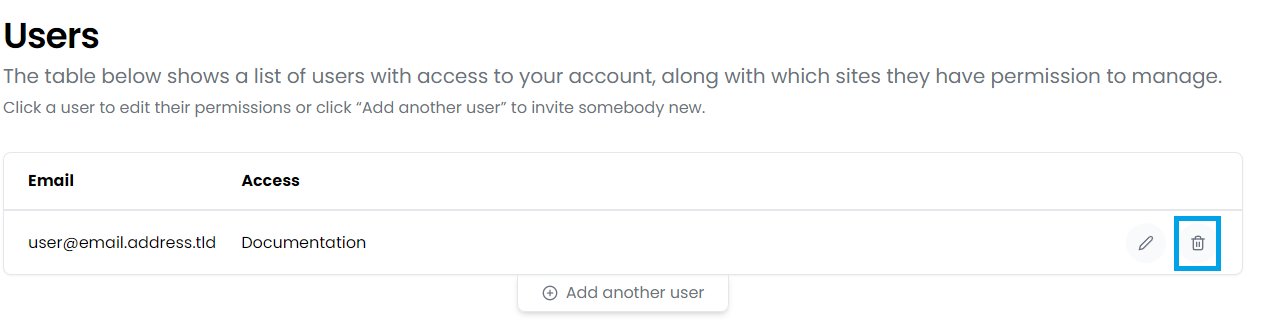
Revoke a users access
- From your Onyx dashboard, dropdown your management menu by selecting your name in the right hand corner

- Select Manage users

Click 'Revoke' next to the user you wish to remove, and click OK on the following check prompt to complete removal.