Installing LiteMage caching for Magento v2

All of our shared and business servers run Litespeed Webserver - Our business servers, where we support Magento installations, also run LiteMage - which allows Magento to take advantage of LiteSpeed's caching. If you're running Magento we strongly advise you install and configure LiteMage to significantly improve the performance of your site.
What can LiteSpeed/LiteMage caching do for my site?
In really simple terms - caching makes your site super-fast for your visitors!
Typically without any kind of caching - when a visitor tries to view your site every component (image, text, scripts etc.) will be requested from the server, the page will be built and then served to your visitors' browser. This all takes time - and whilst it happens your visitor can be left waiting for something to appear on their screen. And we all know how frustrating it is to wait for stuff in a world where we now expect things to be quick! A slow site is likely to lose you visitors - which could mean clients!
What caching does is keep a copy of that built page in memory - so further visitor requests for that page can be served near instantly from the cached version - with minimal impact on the server.
Ok, you may say - what about personalised pages - where there are client details or chunks of personalised information. Well, LiteMage can even handle that - it has a mechanism called Edge Side Includes (ESI) - which allows private data to be served within the publicly cached pages. This technique is called 'punching holes' in the public content. When that content is served again the bulk is served from the cache with the 'holes' being filled with the private individual content.
We typically see massive improvements from simply installing and enabling the LiteMage module with no further configuration. But take some time to configure all the options and your store should be lightning-fast - and that's good for business!
Installing the Magento LiteMage module
This guide describes how to install and activate the LiteMage module for Magento v2.
Pre-requisites to this guide:
- You must have Magento installed and have Administrator access to activate caching after install
- You will require SSH access to your server to perform the installation. We have separate guides for SSH access from a Mac and SSH access from Windows devices.
- You need to be familiar with getting around a linux system at the command prompt - if you're not it would be best to have a developer help you get this setup.
- the PHP
execfunction must be enabled before you start the install and disabled again once you've finished. We have a separate guide on enabling PHP functions.
Installing LiteMage
- Ensure the PHP
execfunction is enabled. We have a separate guide on enabling PHP functions. - Open terminal access to your server account using SSH.
- Change directory to the location of your Magento install - in this guide we installed directly into
public_htmlcd public_html
- We will place the Magento install into developer mode during the installation process.
php bin/magento deploy:mode:set developer
- Now, download the LiteMage module.
wget https://github.com/litespeedtech/magento2-LiteSpeed_LiteMage/archive/master.zip
You'll see something like the following response:--2020-05-04 14:13:43-- https://github.com/litespeedtech/magento2-LiteSpeed_LiteMage/archive/master.zip
Resolving github.com (github.com)... 140.82.118.4
Connecting to github.com (github.com)|140.82.118.4|:443... connected.
HTTP request sent, awaiting response... 302 Found
Location: https://codeload.github.com/litespeedtech/magento2-LiteSpeed_LiteMage/zip/master [following]
--2020-05-04 14:13:44-- https://codeload.github.com/litespeedtech/magento2-LiteSpeed_LiteMage/zip/master
Resolving codeload.github.com (codeload.github.com)... 140.82.113.9
Connecting to codeload.github.com (codeload.github.com)|140.82.113.9|:443... connected.
HTTP request sent, awaiting response... 200 OK
Length: unspecified [application/zip]
Saving to: 'master.zip'
[ <=> ] 59,688 363KB/s in 0.2s
2020-05-04 14:13:44 (363 KB/s) - 'master.zip' saved [59688] - Extract the module zip file - you'll need the path for
unzipon your system./bin/unzip master.zip
You'll see a string of files creating/inflating as they unzip. - Next, we will create a directory for the LiteMage module.
mkdir -p app/code/Litespeed/Litemage
In order for Magento to detect the plugin, this directory must be created relative to the Magento root. - Now we will move the unpacked LiteMage module to this directory.
mv magento2-LiteSpeed_LiteMage-master/* app/code/Litespeed/Litemage/
You can usels -lto ensure that the ownership of the moved files matches the other Magento files. You can usechown -R username:usernameto reset the permission. Changeusernamefor your accounts username. - Enable the LiteMage module.
php bin/magento module:enable Litespeed_Litemage
You'll see something like the following response:The following modules have been enabled:
- Litespeed_Litemage
To make sure that the enabled modules are properly registered, run 'setup:upgrade'.
Cache cleared successfully.
Generated classes cleared successfully. Please run the 'setup:di:compile' command to generate classes.
Info: Some modules might require static view files to be cleared. To do this, run 'module:enable' with the --clear-static-content option to clear them. - As the above message stare we now need to enable the module:
php bin/magento setup:upgrade
- And then recompile Magento - use the appropriate command for your Magento version and number of stores. Run one command only:
You have a single Magento store and are running v2.0.6 or later:php bin/magento setup:di:compile
You have multiple Magento stores or you're running v2.0..5 or earlier:php bin/magento setup:di:compile-multi-tenant
You'll see something like the following response:Compilation was started.
Interception cache generation... 7/7 [=============] 100% 55 secs 360.0 MiB
Generated code and dependency injection configuration successfully. - We're now ready to put Magento back in to production mode:
php bin/magento deploy:mode:set production
You'll see something like the following response:Enabling maintenance mode
Starting compilation
Compilation was started.
%message% 0/7 [>---------------------------] 0% < 1 sec 77.0 MiB%message% 0/7 [>---------------------------] 0% < 1 sec 77.0 MiBProxies code generation... 0/7 [>------------------------] 0% < 1 sec 77.0 MiB
Proxies code generation... 1/7 [===>---------------------] 14% 1 sec 81.0 MiB
Repositories code generation... 1/7 [===>------------------] 14% 1 sec 81.0 MiB
Repositories code generation... 2/7 [=====>--------------] 28% 7 secs 212.0 MiB
Service data attributes generation... 2/7 [====>---------] 28% 7 secs 212.0 MiB
Service data attributes generation... 3/7 [======>-------] 42% 8 secs 212.0 MiB
Application code generator... 3/7 [======>-------] 42% 8 secs 212.0 MiB
Application code generator... 4/7 [========>-----] 57% 18 secs 238.0 MiB
Interceptors generation... 4/7 [========>-----] 57% 18 secs 238.0 MiB
Interceptors generation... 5/7 [==========>---] 71% 45 secs 268.0 MiB
Area configuration aggregation... 5/7 [==========>---] 71% 45 secs 268.0 MiB
Area configuration aggregation... 6/7 [============>-] 85% 51 secs 360.0 MiB
Interception cache generation... 6/7 [============>-] 85% 51 secs 360.0 MiB
Interception cache generation... 7/7 [==============] 100% 56 secs 360.0 MiB
Generated code and dependency injection configuration successfully.
Compilation complete
Starting deployment of static content
Deploy using quick strategy
frontend/Magento/blank/en_US 2352/2352 ============================ 100% 10 secs
adminhtml/Magento/backend/en_US 2467/2467 ============================ 100% 9 secs
frontend/Magento/luma/en_US 2369/2369 ============================ 100% 10 secs
Execution time: 35.355348110199
Deployment of static content complete
Disabling maintenance mode
Enabled production mode. - Next, we need to add the following lines to
.htaccess
You can do this using cPanel file manager or if you're familiar with a Unix editor like nano, from the command prompt.<IfModule Litespeed>
LiteMage on
</IfModule> - Disable the PHP
execfunction within cPanel. Leavingexecenabled is a security risk, so you should ensure you add it back into the disabled functions list upon completion of the LiteMage installation.
Activating LiteMage
The following steps are completed whilst logged in to Magento as the administrator.
- Log in to Magento as an administrator.
- From the left sidebar STORES menu click Configuration.
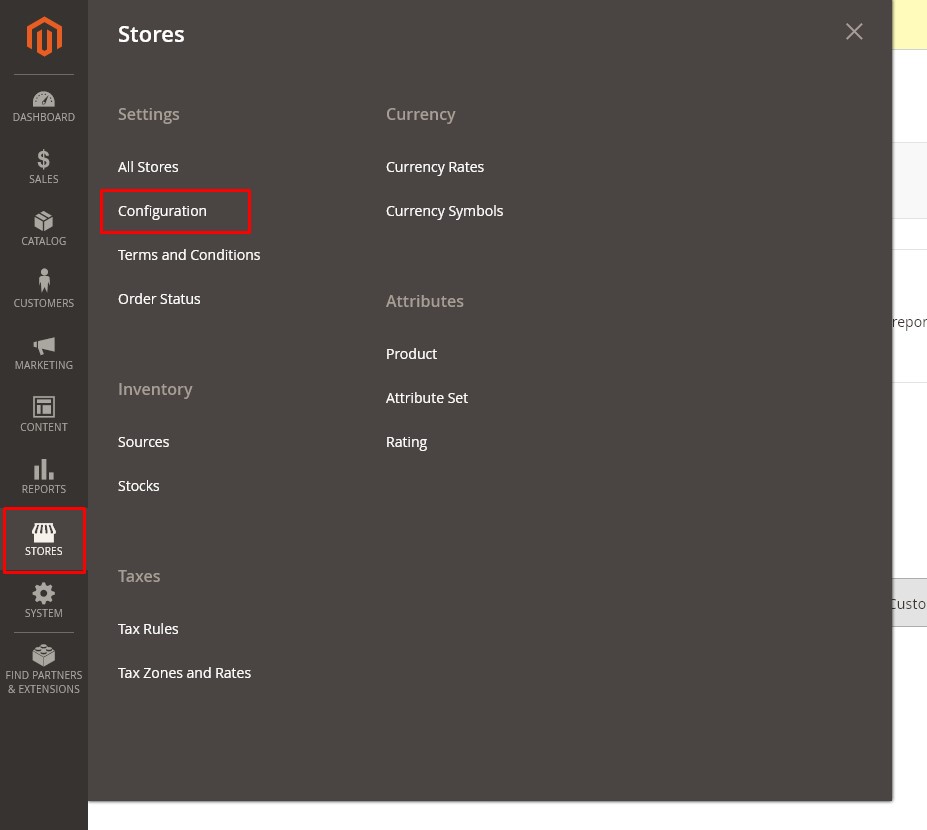
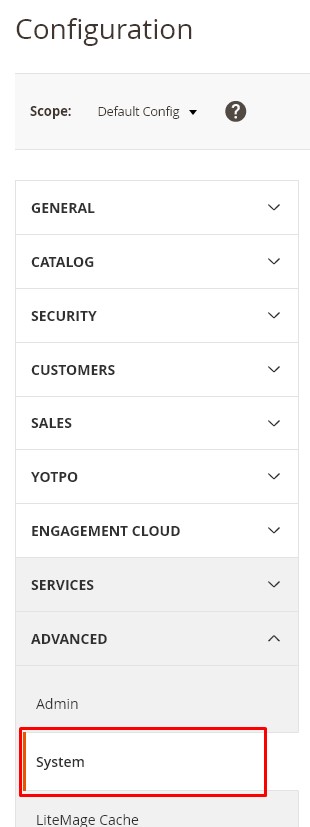
- From the Advanced drop-down click System.
- Expand the Full Page Cache section:
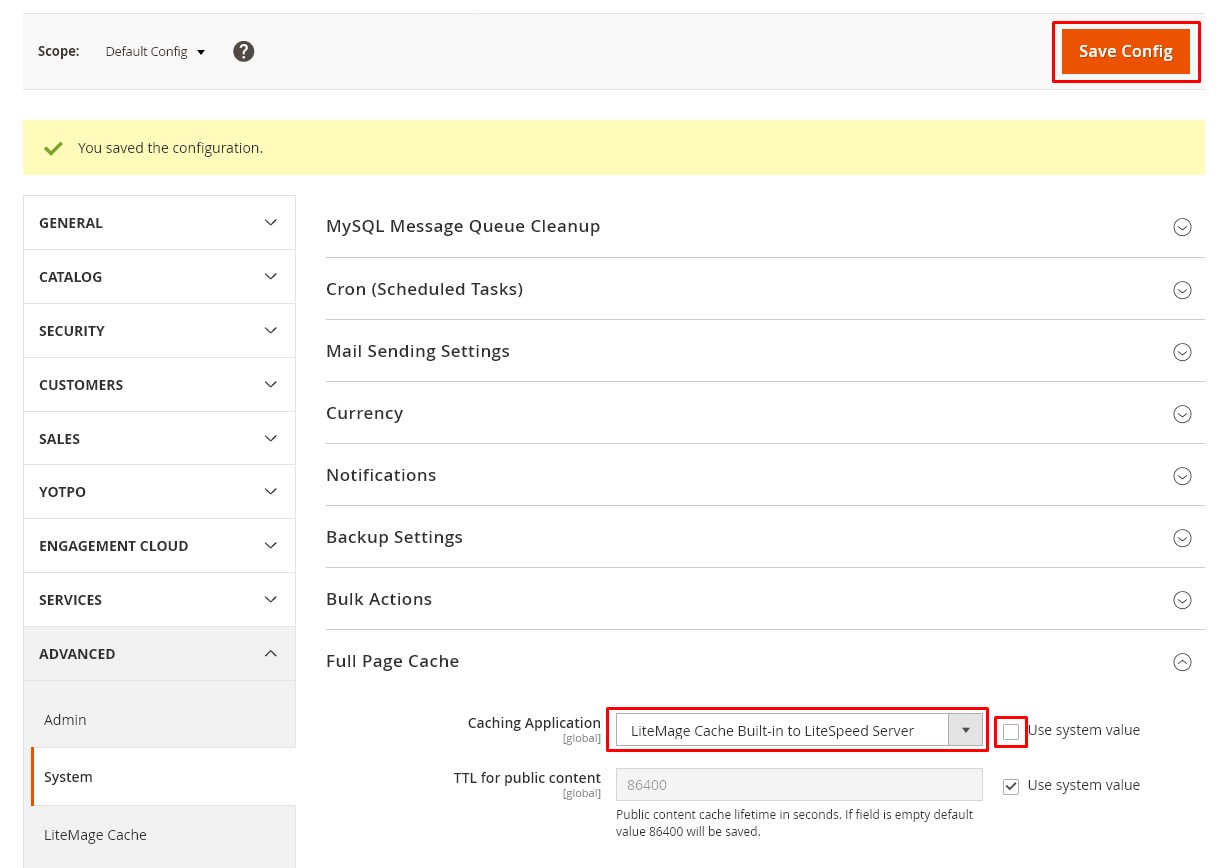
- Untick Use system value
- From the Caching Application, drop-down select LiteMage Cache Built-in to LiteSpeed Server
- Click the Save Config button
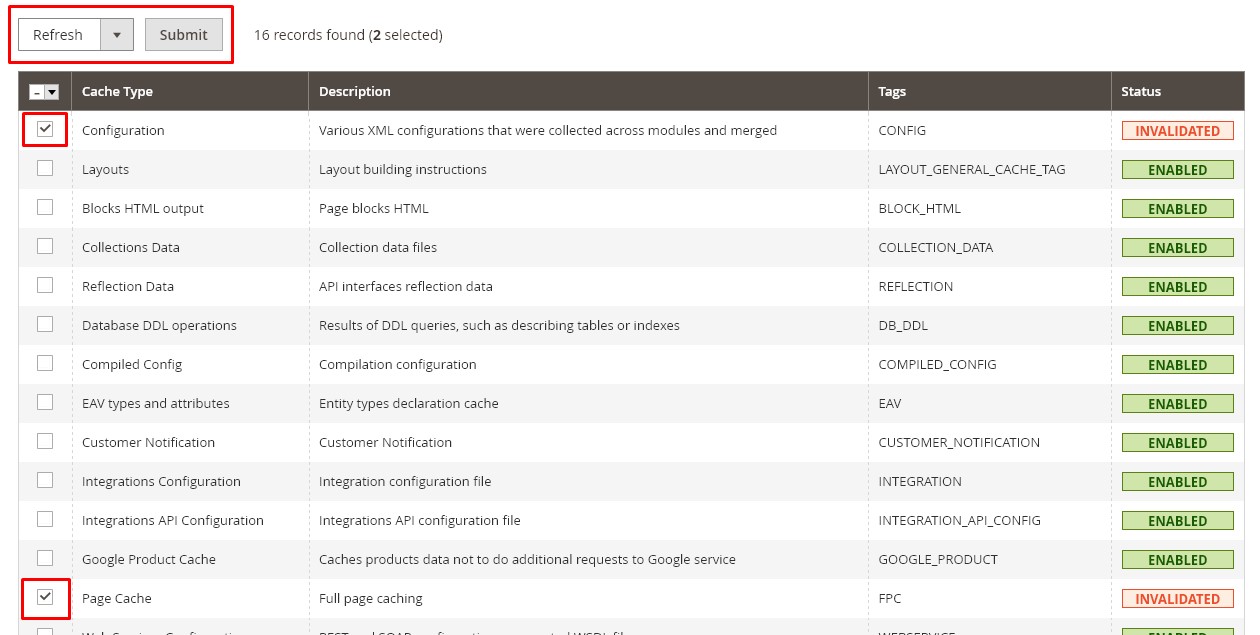
- From the left sidebar, SYSTEM menu click Cache Management.
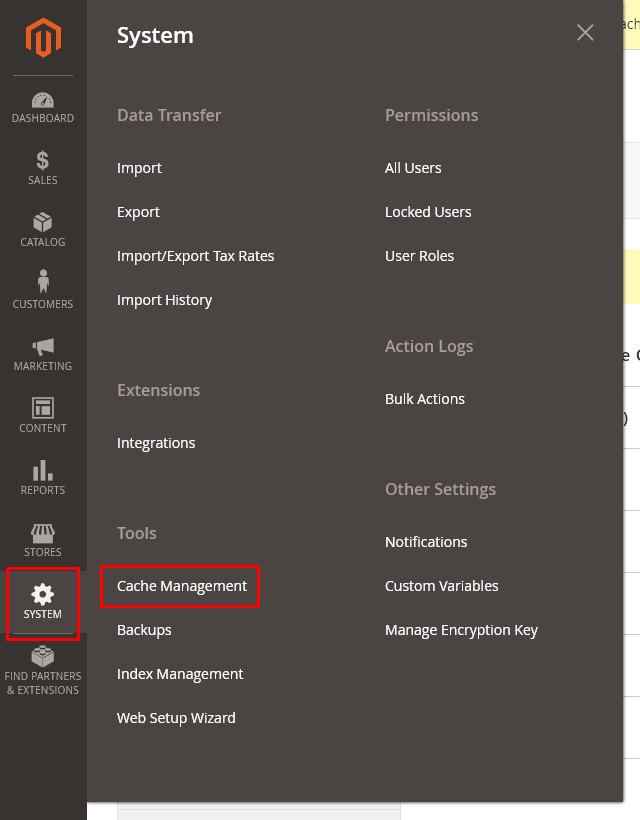
- Check the Configuration and Page Cache boxes. Select Refresh from the drop-down and click the Submit button.
This completes the installation of LiteMage cache. The following section details how to confirm your site is being served correctly from the cache.
Verifying LiteMage functionality
We can verify that pages of your store are being cached using your browsers developer or inspection tools.
We have a separate guide on accessing the developer tools in different browsers.
- Open your browsers developer tools and select the Network tab.
- Visit your Magento site.
- Scroll back to the first request (usually at the top of the list of files now in the Network tab.
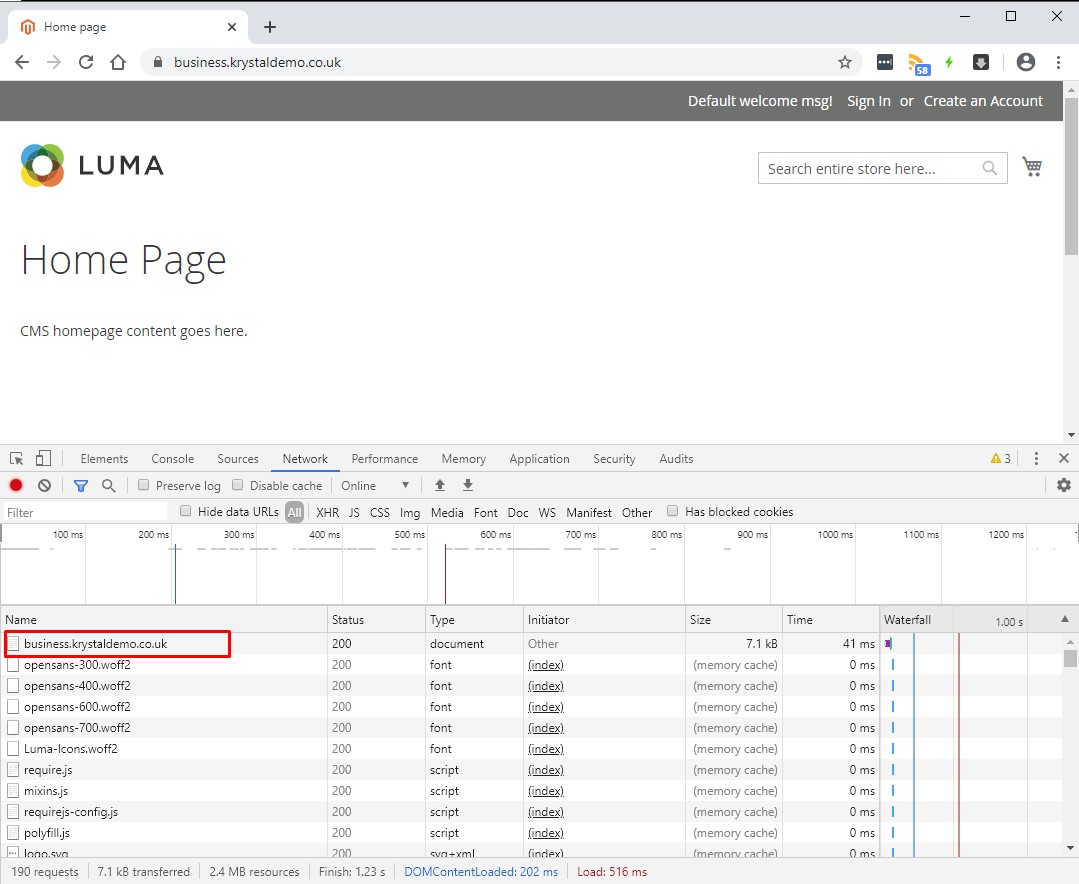
- Clicking the item will normally allow viewing of the Headers.
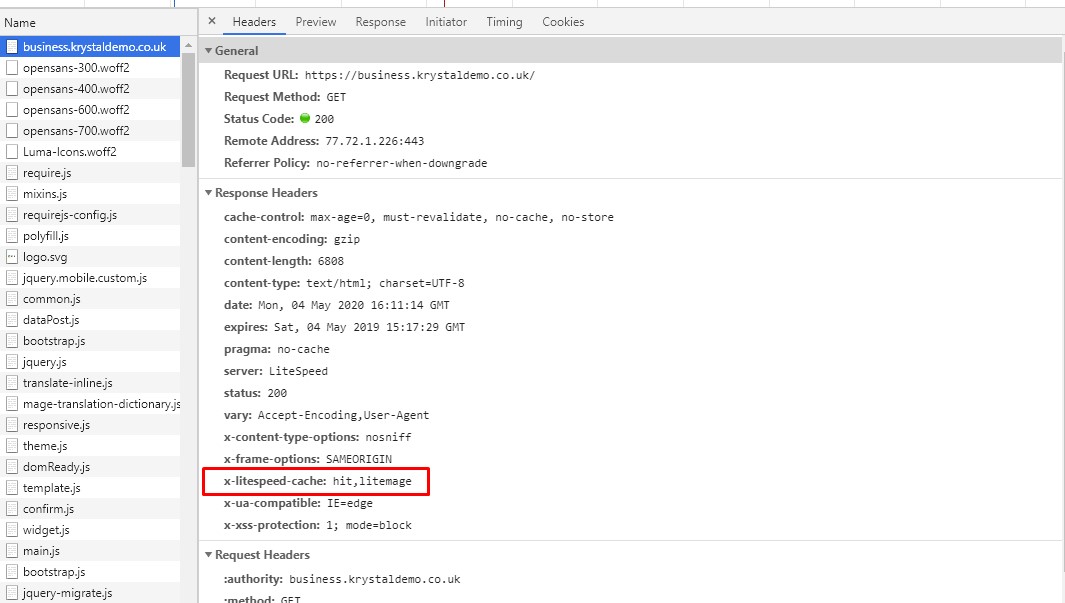
- If you see
x-litespeed-cache:hit,litemagethen LiteMage is working as expected.
If you seex-litespeed-cache:miss,litemagethen often the solution is simply to refresh your browser page.