PuTTY is the de facto SSH client for Windows. Partly because it's free, but mostly because it just works so well!
Download and install PuTTY If this is the first time you are going to use any of the PuTTY tools, then you can download the latest stable release from the PuTTY download website - external link opens in a new window. It's easiest to grab the Windows installer (32-bit or 64-bit available), which will be named something like putty-0.62-installer.exe. Install the applications using the default options. The tools include a number of applications, as follows: PuTTYgen - a tool that generates, imports and exports SSH keys. PSFTP - a simple command line SFTP client. Pageant - an SSH authentication agent that provides your private key data to other applications on your computer, such as PuTTY (below) and Filezilla (a popular FTP/SFTP client). PuTTY - the de-facto Windows SSH shell terminal application.
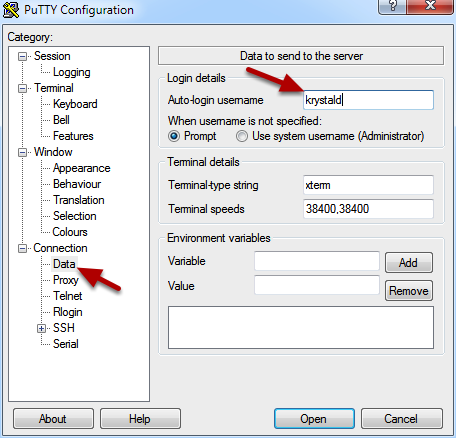
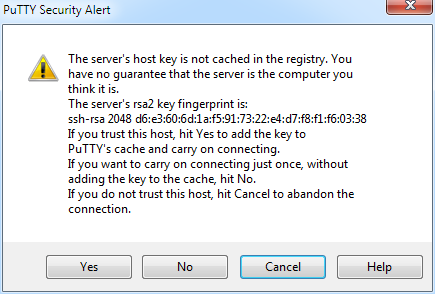
Configure PuTTY to connect to your home directory Start the PuTTY application from the Windows Start menu. PuTTY will work with your cPanel hosting account without requiring any customisation, but here are the basics - to make life a little easier. First we are going to click on the Data category (as below), and enter your cPanel username in the Auto-login username field (krystald in the example).Then, go back to the Session category (as below), and configure the following: Host Name (or IP address): enter your Home Server name, or your domain name - as long as your domain resolves to our IP address then either will work. The example shows a connection to our hestia.krystal.co.uk server. Port: 722 To make it easier next time, you should type a name for this connection profile in the Saved Sessions box, and click the Save button. Next time you open PuTTY, you will be able to simply double click on your saved session name to reconnect using the same settings.If the details for the new connection you've just created disappear when you clicked save you simply need to select the Saved Session you require, click Load and then Open. Otherwise at the point you can click the Open button to connect to our server! If all goes well, you should get a fingerprint warning like this:If you have managed to get this far, then it is highly unlikely you are connected to the wrong server. However, if you enjoy a healthy paranoia around security issues, then you can ask us for the server's RSA fingerprints to make sure it matches. Once you're happy that you are not being duped click Yes - the fingerprint will be stored on your computer and if it the fingerprint of our server ever changes in future you will receive an alert when connecting. Once you have connected, you will see the shell login prompt. Enter your cPanel password, and you are in! Note that as you type the password the cursor will not move, it will just stay a green block - so please take care to enter your password correctly.
In future, to reconnect to the same server again you'll simply need to select your Saved Session, click Load and then Open.