Connecting to your Onyx Database via MySQL WorkBench
 Updated 3 years ago
by
Tristan Payne
Updated 3 years ago
by
Tristan Payne
This is a brief guide covering connecting to MySQL on Onyx. For this guide we will be using an SSH Tunnel within the MySQL WorkBench tool provided by the MySQL website - external link opens in a new window.
Other remote MySQL software may look slightly different, but the general information required will be the same.
Prerequisites
Before you attempt to connect to your sites database, you will first need to ensure that you have enabled SSH/SFTP via your access details within the Onyx portal.
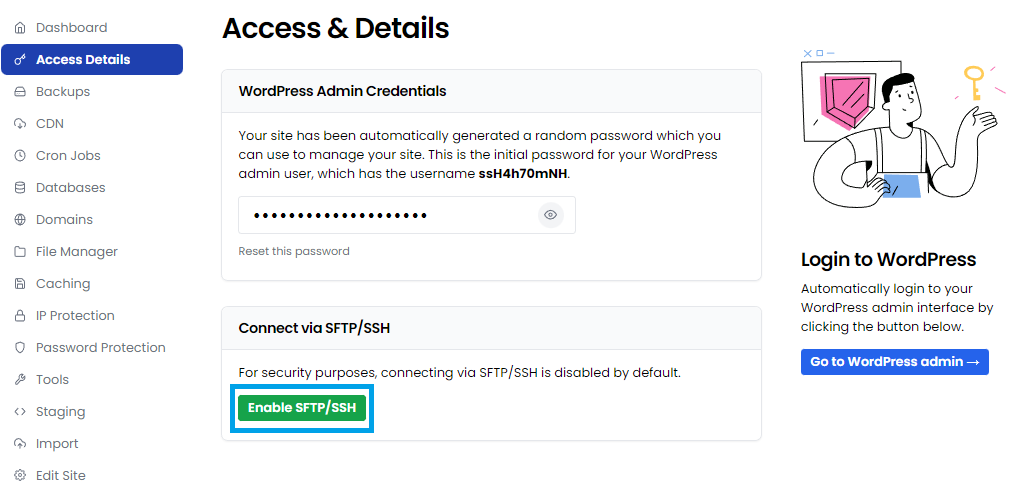
We have an easy to read guide that covers this process step by step Here (Link opens in a new tab).
Connecting using MySQL WorkBench
Once you have installed and opened MySQL WorkBench (or your database access tool of choice), Create a new connection using the following details:
- Connection Name: Enter a name to identify this connection.
- Connection Method: Select Standard TCP/IP over SSH.

- SSH Hostname & Port: Use sites01.sites.onyx.io:PORTHERE
(In this case We will be using 30954 however you should use the SSH port shown in the Access Details section of the Onyx Portal)
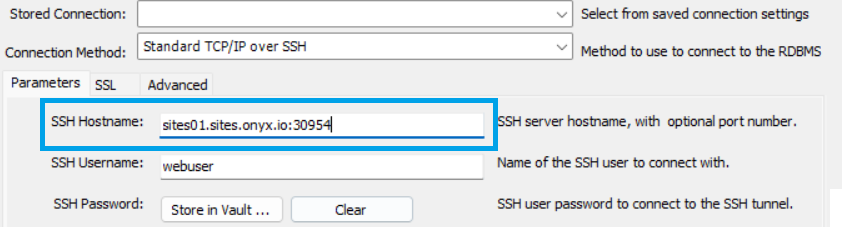
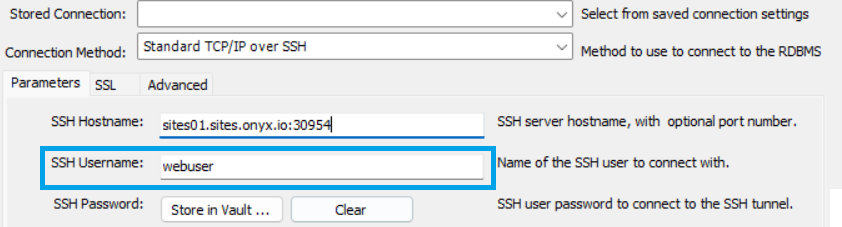
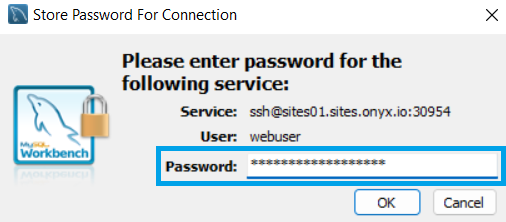
- SSH Username: webuser
- SSH Password: Click the Store in Keychain (MacOS) or Store in Vault (PC) button.
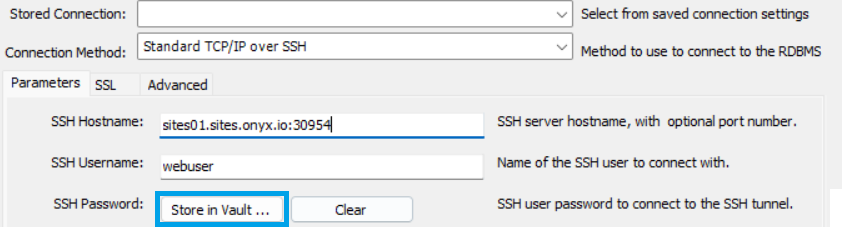
- Enter your password from the Access Details section of the Onyx Portal.
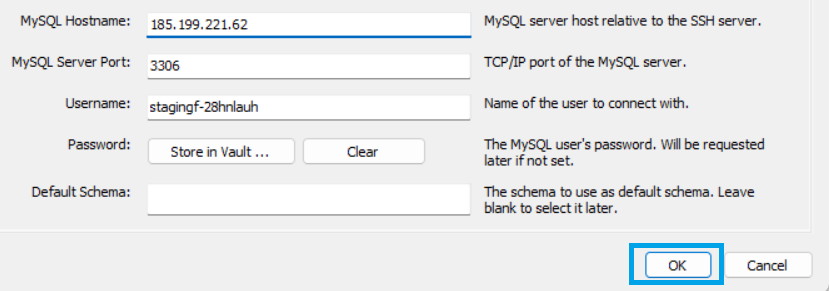
- Within your Onyx Portal, Navigate to Databases and select the Database you would like to connect to:
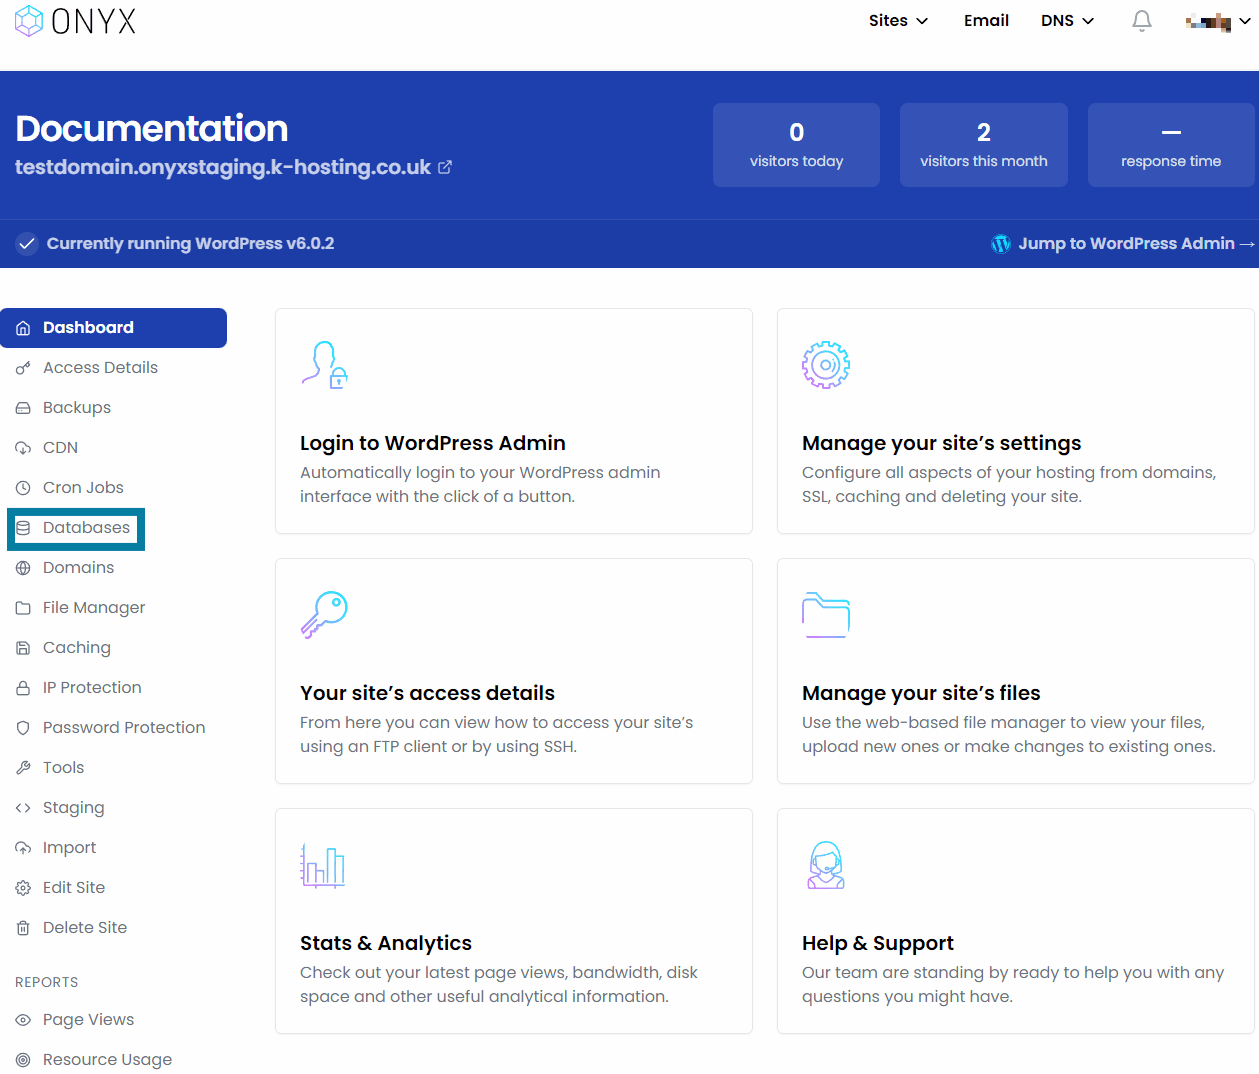
- MySQL Hostname: This is simply the IP of the Onyx Database server and can be found within your Onyx Dashboard > Databases.

- MySQL Server Port: 3306

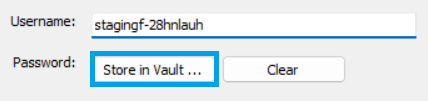
- Username: Enter the MySQL username shown in your Onyx Dashboard > Databases here.

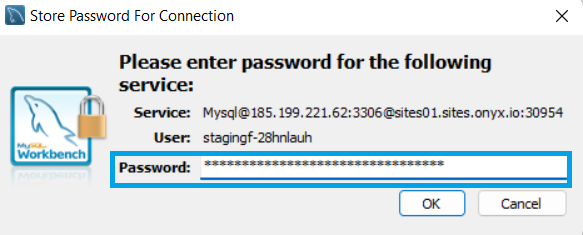
- Password: Click the Store in Keychain (Mac) or Store in Vault (PC) button.
- Enter your password as shown in your Onyx Dashboard > Databases
- Click OK to test the connection
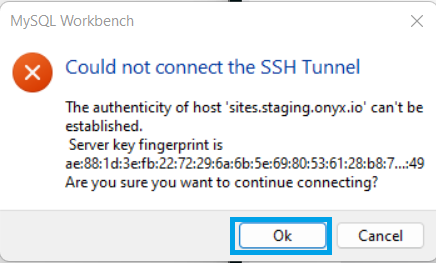
- You may see the following certificate warning that you will have to accept before the connection can be established:
- Click OK to save the connection.
- Done! You can now simply click the connection in the MySQL WorkBench dashboard to open the SSH tunnel and connect to the Onyx database.