New Onyx sites are provisioned with a holding domain (e.g. onyx-demo.onyx-sites.io), however it's likely you'll want to connect your site with your own domain.
There are two steps to this process, firstly connecting your domain to your Onyx site - covered in this guide, and secondly deciding how you want to point your domain to Onyx - either by adding an A record if you host your domains DNS elsewhere, or setting your domains nameservers to Onyx and making use of the Onyx DNS Tool.
This guide walks you through connecting your domain to Onyx and deciding between the options for the second step.
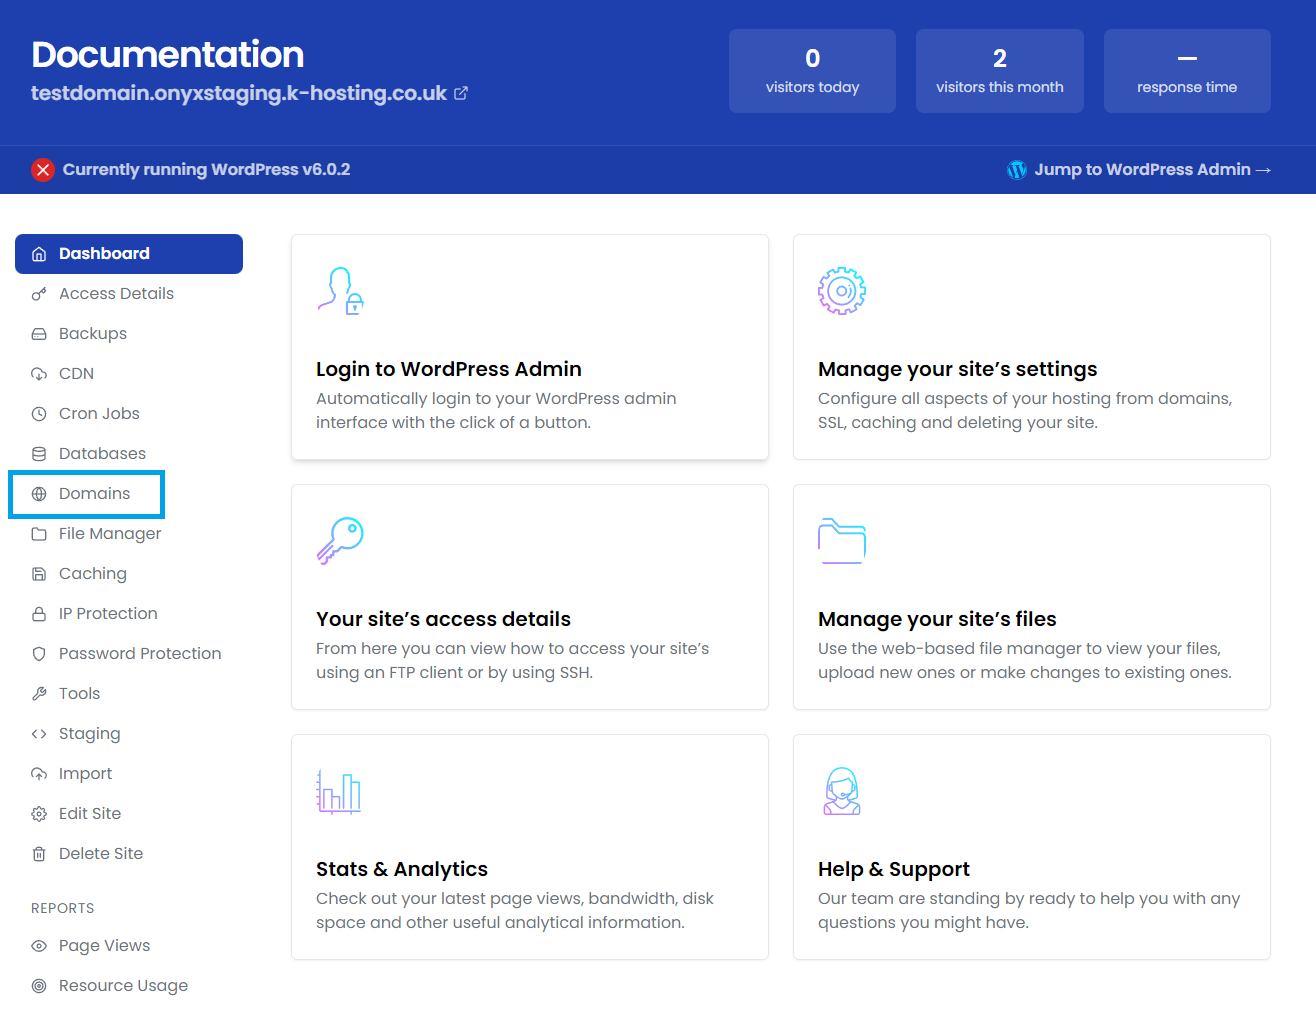
From your Onyx dashboard, click on the site you'd like to access.
From the Settings drop-down on the left click Domains and then click Add a domain.
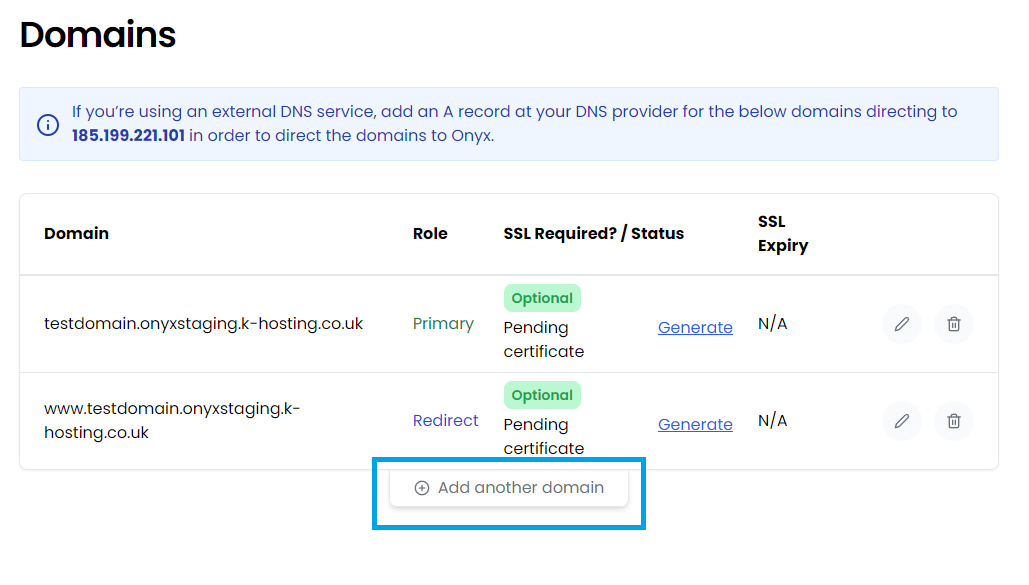
Click on add domain
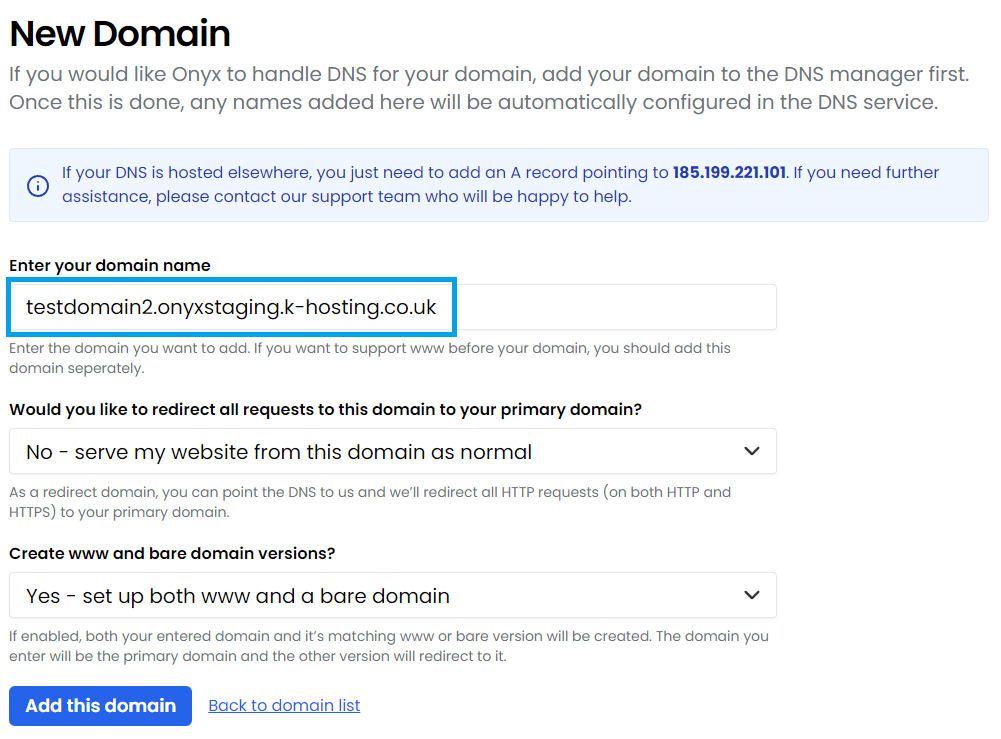
You can now enter your domain.
Would you like to redirect all requests to this domain to your primary domain? This field is essentially asking you if you want to redirect all visitors to this domain name to the first domain name you added to your site. For example, if you already have domain.com set up on your site and you are adding domain2.com then selecting yes here will redirect all visitors to domain2.com to domain1.com. However, if you use WordPress's multi-site functionality you'd not want this to happen at all and so selecting No is more suited in that case.
Create www and bare domain versions? In the vast majority of cases this field can be left as is. Selecting yes will create the alternative domain name to that you entered in the initial domain name field. For example, if you entered www.domain.com then the Onyx platform would also create domain.com without the www. This is the intended behaviour for most web-traffic these days, however if you have a specific requirement and do not want the alternative domain created on Onyx then you can set this to No.
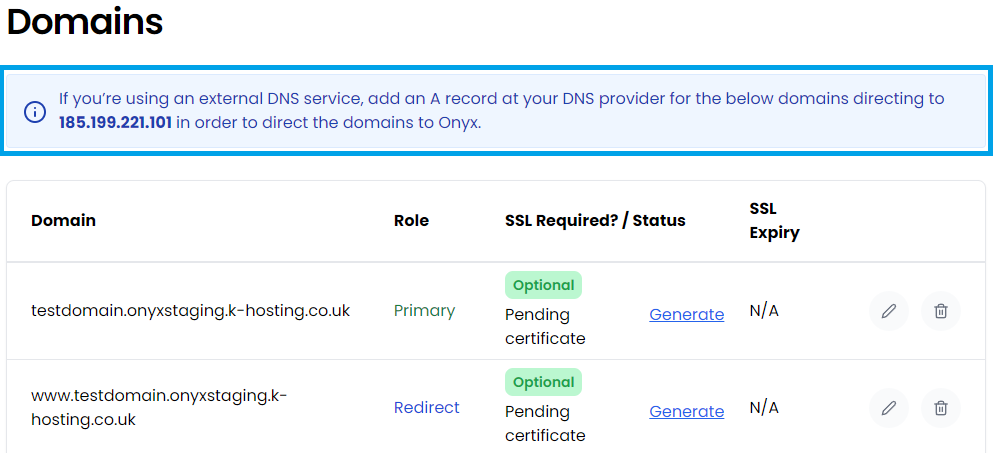
Click Add this domain to complete this part of the process.You'll see the domain, and if you've selected it, the two variants; www and non-www
Within a few minutes Onyx will have automatically issued SSL certificates - and you can refresh the screen and see that the SSL status has changed to Ready to go.
Pointing your domain to the Onyx platform
You have two choices for this step, depending on whether you are managing the DNS for your domain on the Onyx platform or elsewhere.
Managing your DNS elsewhere
You may opt for this approach if you have your email hosted elsewhere (you'll have MX records included in your DNS) or you have other DNS records that you'd rather not re-create. Simply changing the A record to point to your Onyx website will ensure email and other functions that rely on DNS entries you have in place will continue to work.
This method requires that you add/change the DNS A records for www and non-www variants of your domain to the IP specified in your Onyx site's Domains settings page. You will need to make these changes wherever you manage your domains DNS.
Follow steps 1 to 3 above to view your sites Domain settings, you will see a banner detailing the IP address to use for the A records
Once the A records are added and DNS has propagated, your site should be visible on the www / non-www variants as you have configured.
Managing your DNS with the Onyx DNS Tool
Opting for this method means all your DNS records will be managed within the Onyx DNS system. If you have custom MX records (for email hosted elsewhere) or other custom DNS records for things like Google authentication which need to stay in place, you'll need to ensure these are re-created with the Onyx DNS manager before you change your nameservers.
Change your domains nameservers to ours. These are:
ns1.onyx.io
ns2.onyx.io
When you connected your domain Onyx will have automatically added a DNS zone with the correct entries for the options you selected (www / non-www).
Changing your nameservers makes Onyx responsible for your DNS. If you make use of third party email providers or point other DNS records elsewhere you will need to configure these within the Onyx DNS tool prior to switching your nameservers. If you’d rather Onyx did not control your DNS then please see the Managing your DNS elsewhere section above.
 Updated 3 years ago
by
Tristan Payne
Updated 3 years ago
by
Tristan Payne