How to add Contacts and Sub-Accounts to your Krystal Client Area

Contacts are added to allow additional people to receive copies of communications (e.g. invoices sent to your accounts department).
Sub-Accounts allow users of your choosing to log-in to your Krystal Client Area with the permissions you assign.
Add a new Contact
Log in to your Krystal Client Area.
- Click the "Account" -> "Contacts" button on the dropdown in the top right area of the screen.
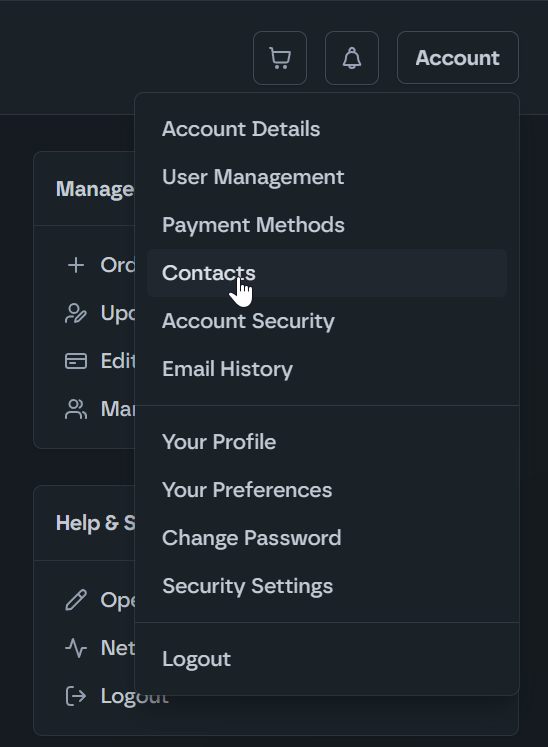
- If this is the first Contact then Add New Contact will be selected by default and you can just continue to add the details. If Contacts already existing you'll need to select Add New Contact and click the Go button.
Enter the details. First Name, Last Name, Email Address and Phone Number are required.
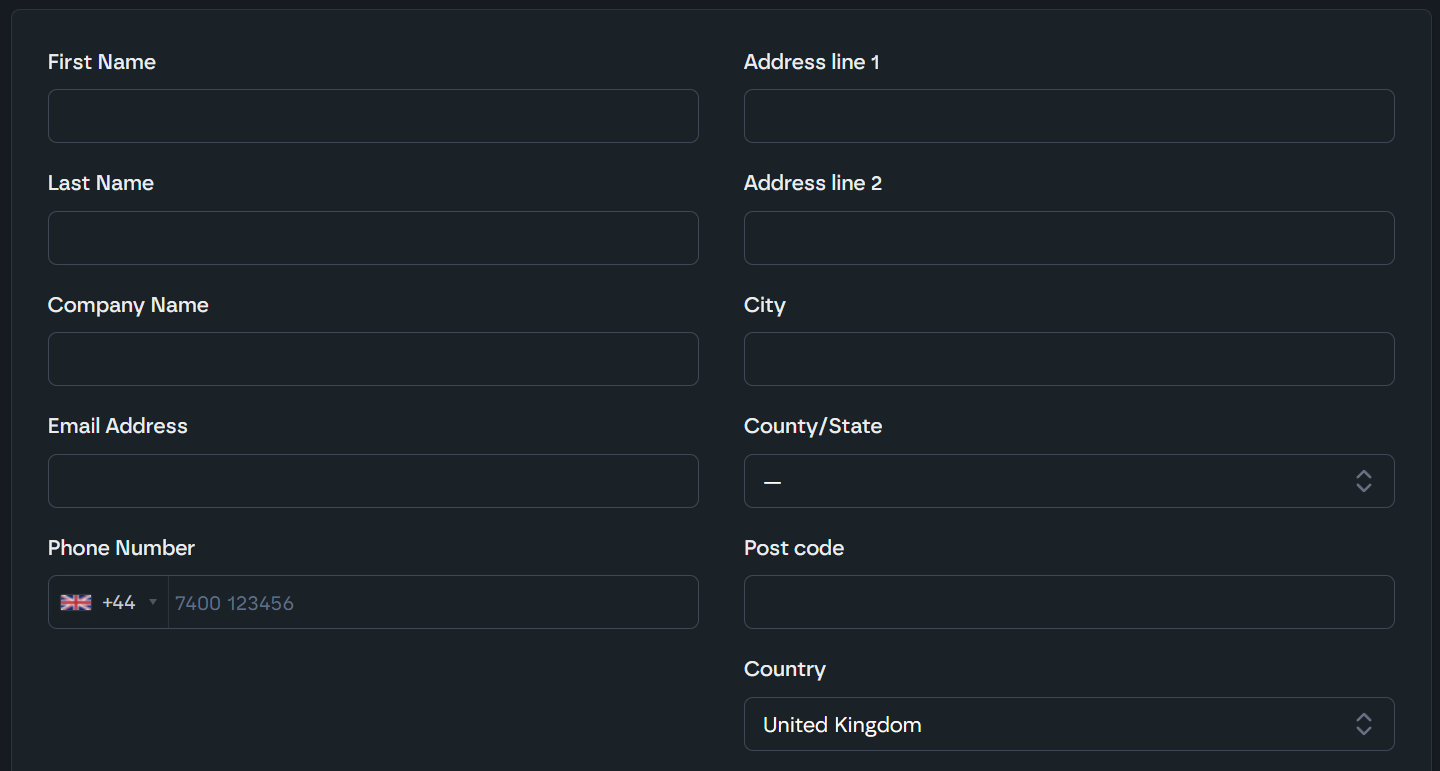
Complete the remaining address details and if required tick which communications this contact will receive.
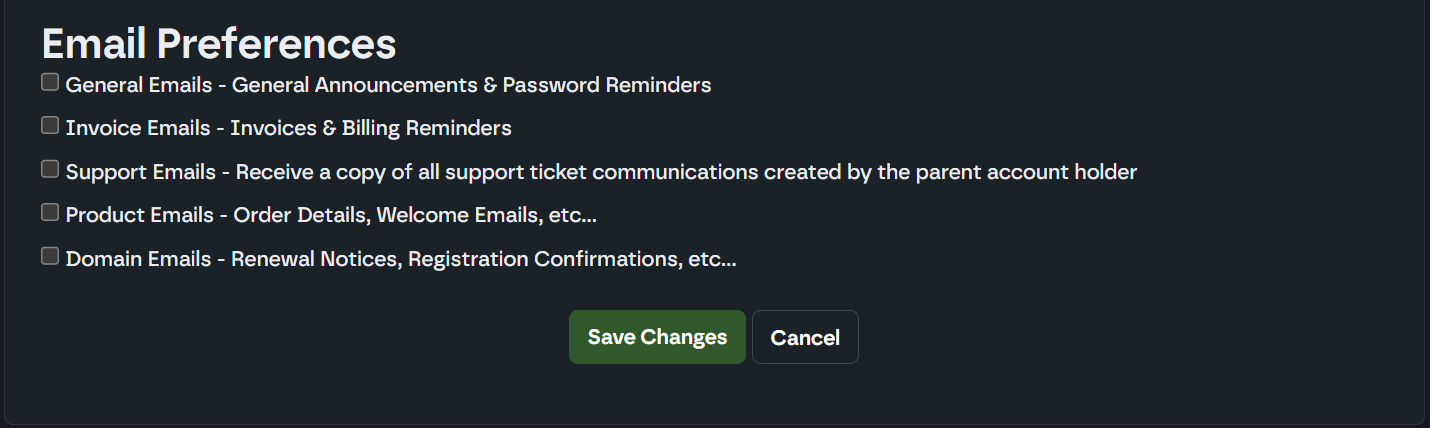
Click Save Changes to save this contact.
Creating a Sub-Account user
- Log in to your Krystal Client Area.
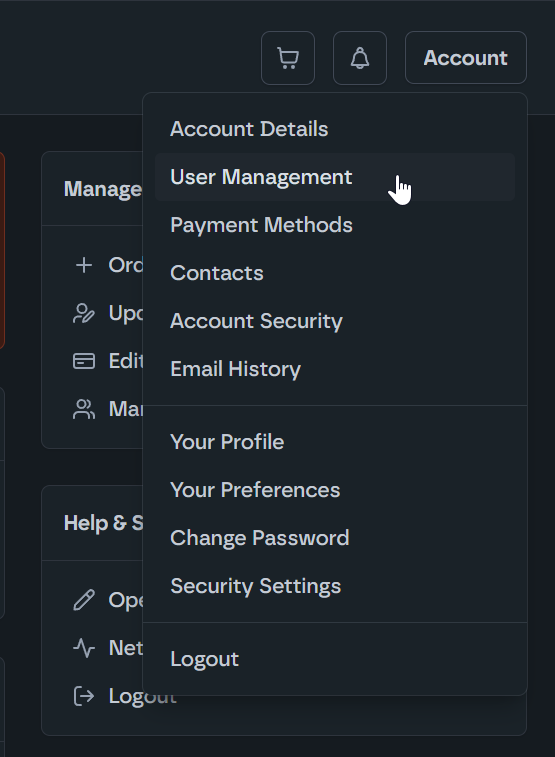
- Click Account in the top right corner.
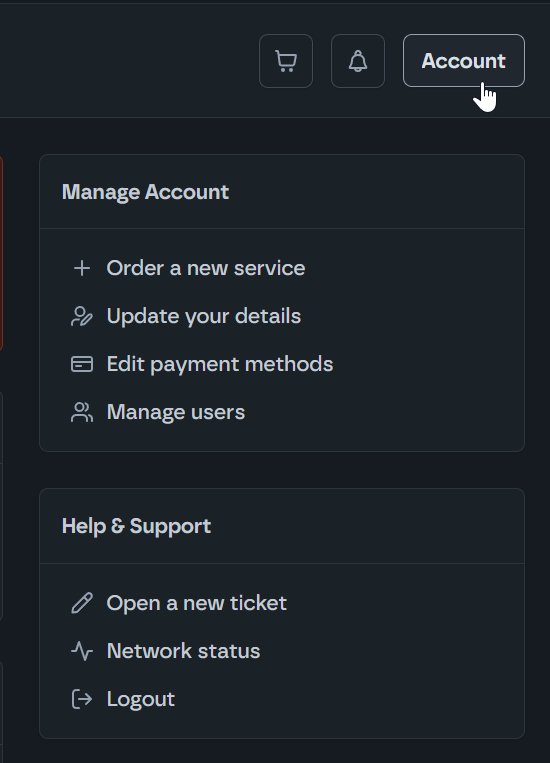
- Select the User Management option from the dropdown
- Enter your new subaccount user's email address under the Invite New User header.
- Select your users permissions and access level.
Note: We strongly recommend manually selecting subaccount user permissions.
In order for a sub-account user to actually be able to access products (cPanel/WHM) via the products, they must also be granted the Perform Single Sign-On permission. There is no further granularity - if a user is granted this permission, along with View Products & Services they will be able to view and access all products within the account.
In order for a sub-account user to actually be able to access products (cPanel/WHM) via the products, they must also be granted the Perform Single Sign-On permission. There is no further granularity - if a user is granted this permission, along with View Products & Services they will be able to view and access all products within the account.
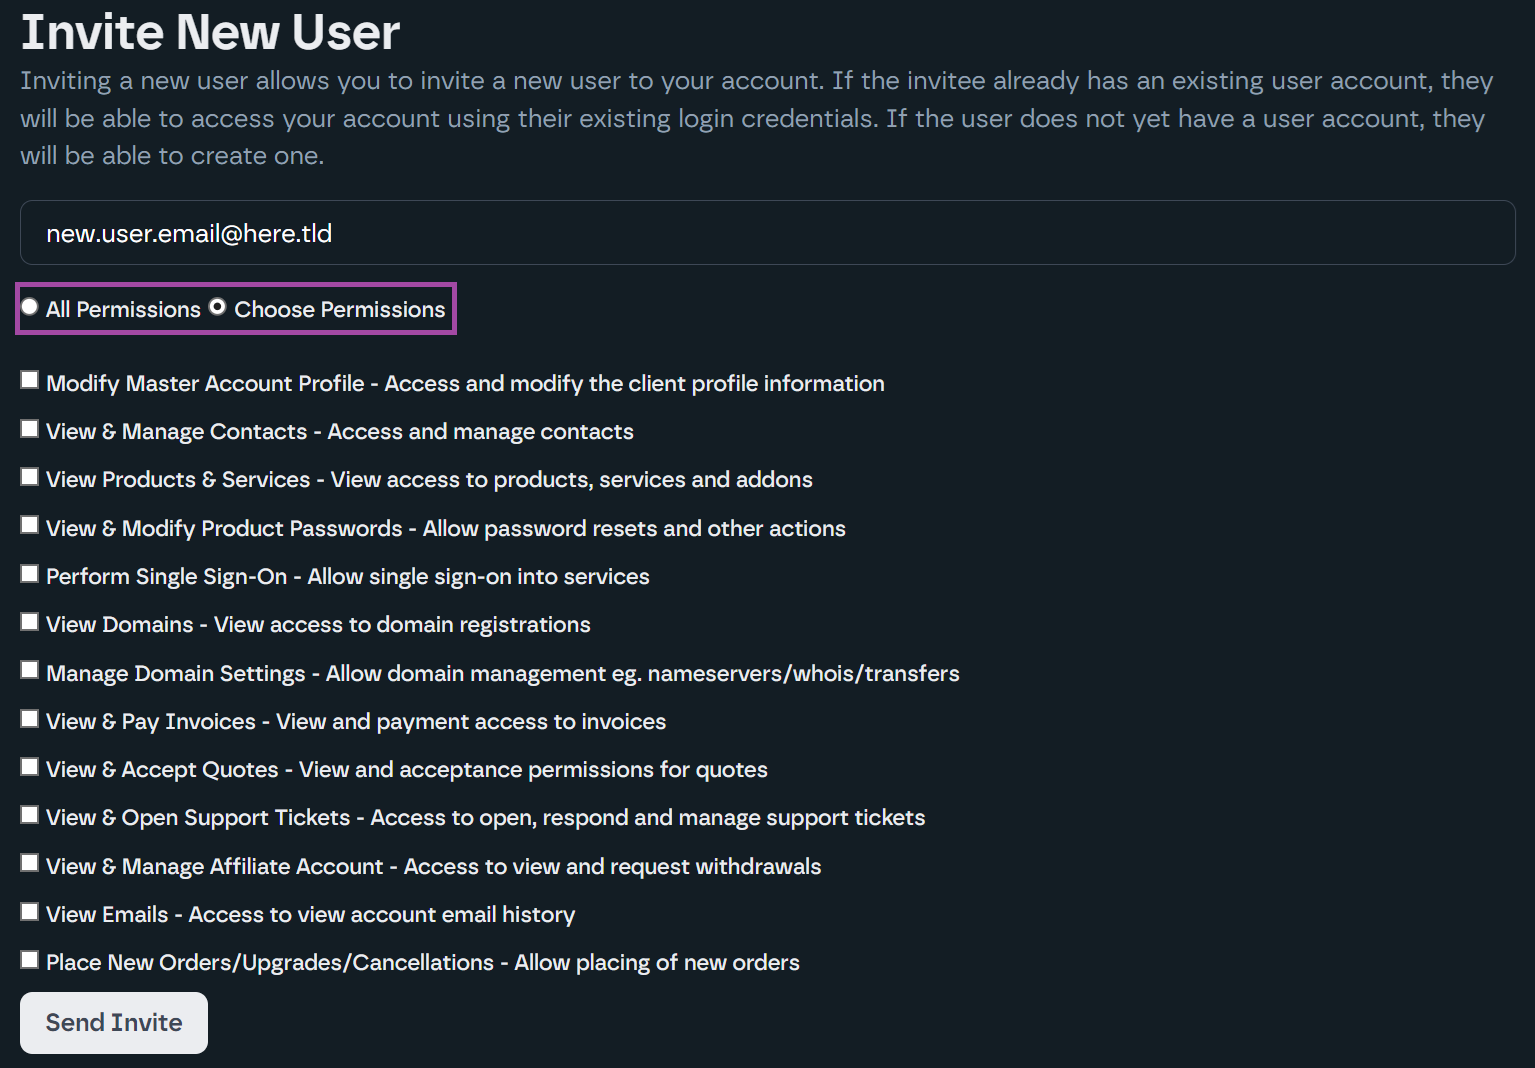
- Click Send Invite.
This will send your new user an email that will ask them to create a password to allow access to the account.

- Done!