Measure and reduce disk usage in cPanel
 Updated 3 months ago
by
Tristan Payne
Updated 3 months ago
by
Tristan Payne
Your digital garden

We've all been there – that heart-stopping moment when you realise your website or server is running low on storage space.

Thankfully, cPanel allows you to monitor your usage statistics and can quickly show you where your usage comes from, and can help you remove and unnecessary data.
Your cPanel account is like a lush garden full of digital possibilities, and just like tending to your plants, maintaining a flourishing online space requires regular care and pruning to ensure that your online space can bloom without becoming overgrown and cluttered.
Whether you're a seasoned horticulturist of code or a content seedling, we're here to show you how to cultivate a space that's both bountiful and efficient. Discover how to use cPanel's tools to identify storage bottlenecks and weed out those files that are crowding your virtual beds.
cPanel Disk Usage Tool
For this guide, we have recreated an example cPanel account that has many of the common large files we regularly see when helping clients de-clutter their hosting accounts.
Before we start tending to the garden and removing data, we first need to know where the problem areas are. This is where the cPanel disk usage tool comes in. This will give us an overview of our digital garden and let us see any problem areas that are overgrown or ravaged by weeds.
To access this, you will first need to log into your cPanel account (Link opens in a new tab)
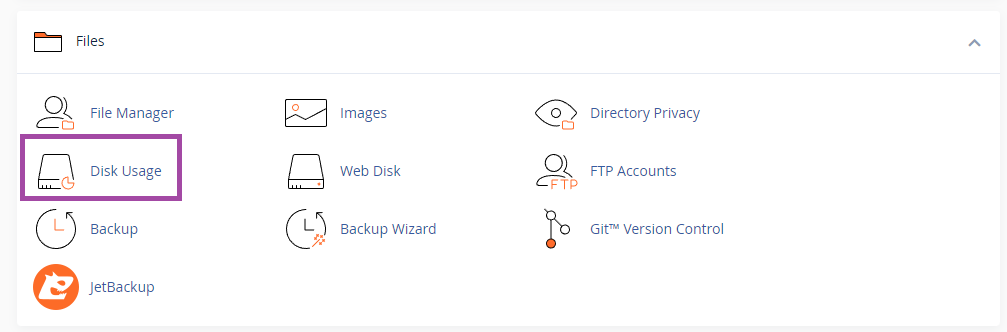
From within cPanel, navigate to files, then click Disk Usage
Scroll down to the sort directories by section, and click the Disk Usage button.
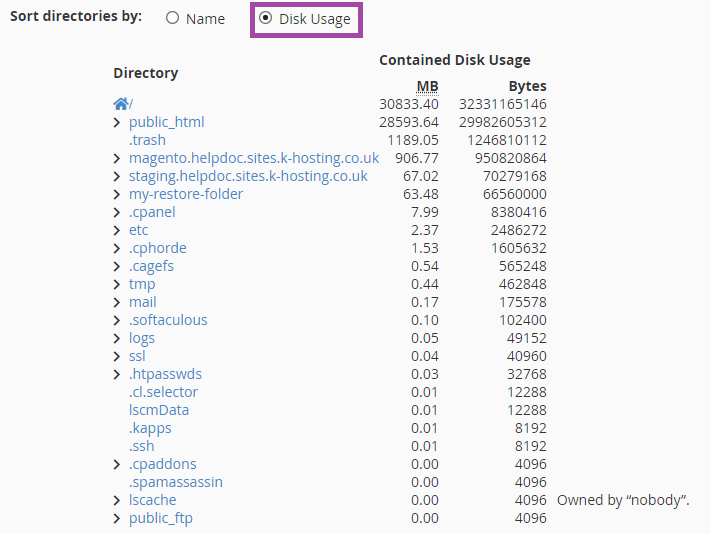
From here you can click on the arrow corresponding to the largest folders to identify any specific folders or individual files that may need to be removed.
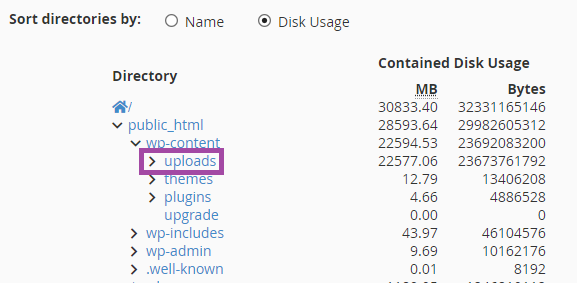
In this case, we can see that the public_html directory is using the majority of our disk space. Expanding this further, we can see a significant amount of our storage use is coming from within the wp-content/uploads/updraft directory.
Based on the findings from the Disk Usage tool, we are now able to use the cPanel file manager to locate the large files within this directory and prune them.
Using the cPanel File manager
cPanel comes with a full-featured file manager. This article only describes it's basic functionality.
You can find it at cPanel > Files > File Manager

If you would like to delve deeper into all of the features of the cPanel file manager, I would suggest reading through our in-depth guide on Using cPanel File Manager (Link opens in a new tab).
Home Directory
Once we've opened the file manager, we will immediately see the home directory.
It's a good idea to take a look through the files stored here as it is not uncommon for certain plugins to create unnecessary backup files here and this can use a significant amount of your available disk space while providing no benefit.
Lets take a look at the example account below:
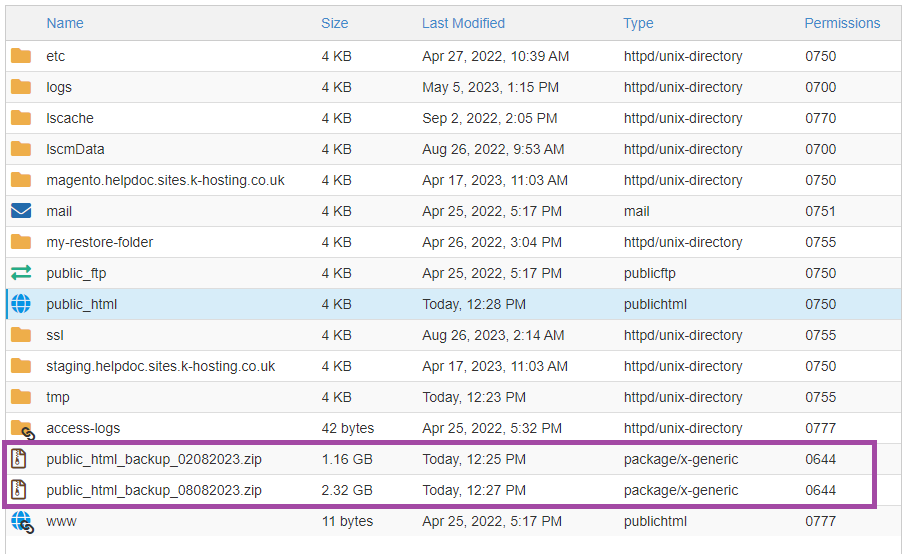
We can clearly see two compressed files taking up almost 3.5 GB without providing anything to our site!
Normally, these will have been generated by either a plugin on your site, or manually created using the cPanel backups tool.
Either way, there's a good chance that these are not needed as all of our shared hosting accounts offer a minimum of 1 full account backup per day via Jetbackup (link opens in a new tab). These are stored off site and we will retain 30 days worth of backups.
The best part? These don't count towards your overall disk usage, so there's no need to store a separate backup within your account. We've got you covered!
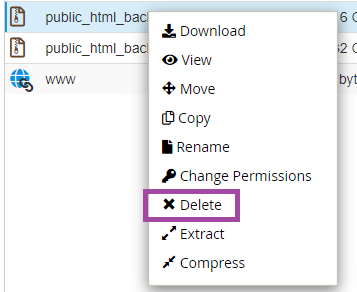
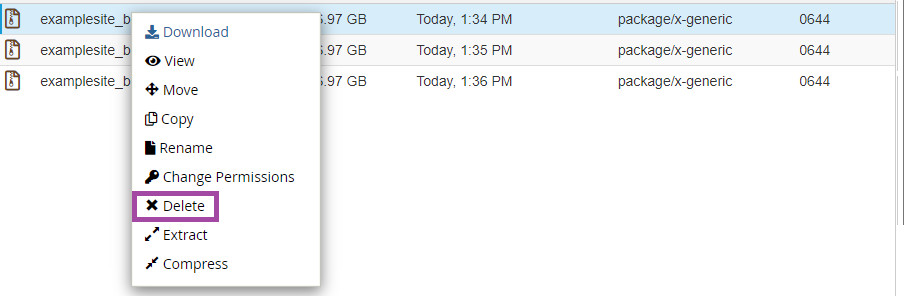
To remove these files, simply right click on the file and select the Delete option.
Now that these files have been removed, we can address your websites home directory, for primary domains this will be the public_html directory.
public_html
The public_html directory is the standard home directory for your cPanel accounts primary domain. This also happens to be where a lot of redundant files end up. Lets take a look at the example site again:
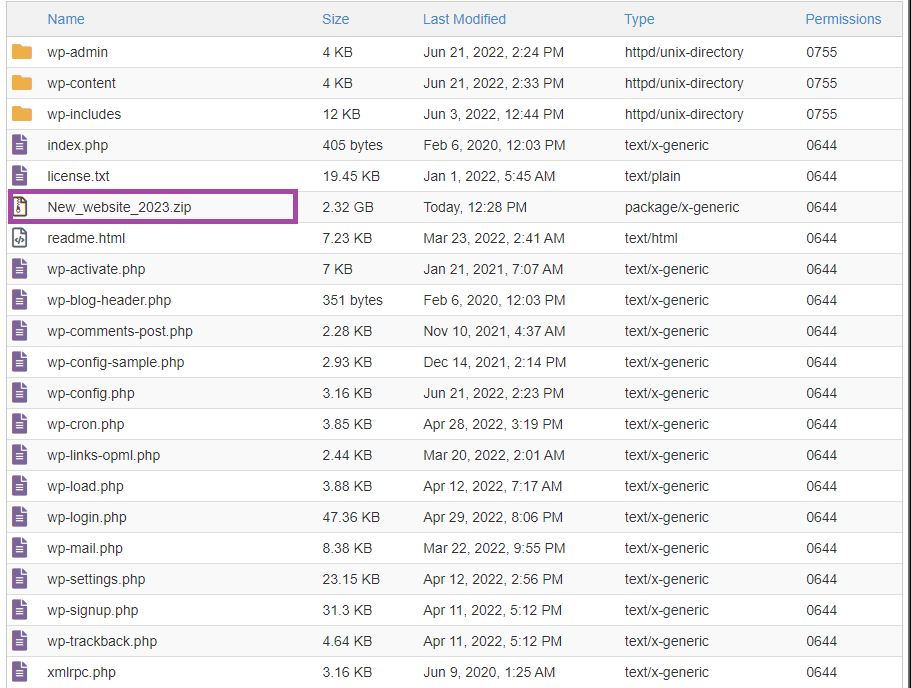
The majority of the files here are responsible for running our site, but, in this common scenario, our developer seems to have left the original copy of the site here too!
As with the backups mentioned previously, if you aren't sure about removing this, it's worth downloading a copy of this backup before deleting the file.
Now that our websites home directory is clear, its time to take a deeper look into the site files!
Backup Plugins (wp-content)
This is without a doubt the easiest way to clear space on your site. As mentioned previously, all of our shared hosting accounts come with a minimum of 1 backup per day. This frees you from the responsibility of managing your own site backups.
While this is becoming a more common practice among web hosts, many developers will still install a backup plugin like Updraft when building websites. While it can be helpful to have regular backups of the site, these should be stored locally to allow you to make the best use of your hosting account.
Our example website happens to use updraft, but your website may vary. In most cases these backups will be stored within your wp-content directory and the best way to track these down is using the cPanel Disk usage tool from the beginning of this guide.
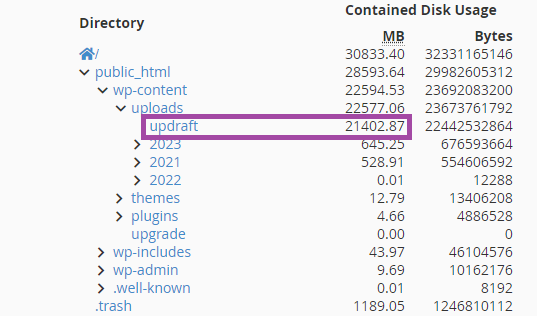
If we navigate to the wp-content/uploads/updraft directory on our example site, we can see the following:
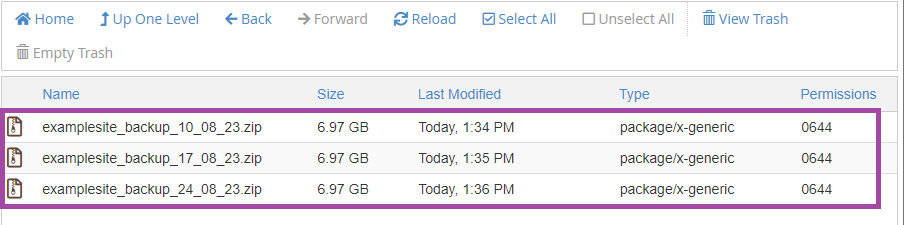
We have 3 very large backup files in here that we don't need!
We can follow the same process for the other large files and remove these by right clicking and selecting Delete.
So far on our mission to de-clutter our website, we have removed 26.5GB of just backup files!
While this example is extreme, ensuring that there are no large compressed files within your sites directories is a good start and will get us most of the way to having a smaller, more efficient site.
Image Compression
According to the HTTP Archive, images make up over 45% of an average website’s page weight on both desktops and mobile devices.
Needless to say, reducing the size of your images is important for both the storage savings and the overall speed of your website.
In the majority of cases, your raw images will be a much higher resolution than the images you actually want to serve to your users. For this reason, it only makes sense to reduce the overall size of these images.
While the impact of compressing a single image may seem small, when you take into account that your site may potentially have hundreds of images, this can dramatically reduce the overall disk usage.
Unfortunately, there are no global rules for how high the resolution should be for your images or how compressed these should be. This will vary from site to site. The best place to start would be using an image compression plugin like LiteSpeed Cache (Link opens in a new tab) or Smush.
Using a plugin will help to speed up the compression of existing images while also automating the task for any new images added to the site in the future.
Website Data
Everything we have covered so far can be implemented by any user of any experience level, however, for this section you may wish to speak to your developer as the next steps will involve removing site files and doing this incorrectly could directly impact your users.
Unused pages
As your site grows, it is normal to have older content that is no longer relevant or necessary and pruning this is an important part of allowing your online presence to grow sustainably.
We suggest reviewing your pages regularly to identify any pages or images that are no longer reaching an audience and could be removed from your site entirely. If you are not comfortable doing this yourself, we strongly recommend reaching out to your developer.
Reducing the size of log files
The majority of your logs are generated by PHP or by your various web applications. The size or presence of these logs depend on the log type, level and the software that is used to generate the log.
In most cases, your log files will be a very minor portion of your disk usage, however, if something goes wrong these small files can quickly become gargantuan.
The best way to tackle log files is to reduce the number of entries. We have some simple tips that can help you achieve this:
- Keeping your software up to date
This includes your CMS (Content Management System), plugins, add-ons, themes, PHP version etc. While keeping your site up to date is a key factor in ensuring that your site is secure, it is also the main cause of bloated log files as the warnings and errors resulting from version mismatches can quickly increase the size of your log files.
- Make sure you meet the requirements for your software
The most common example of this is with WordPress sites. If your plugin is not compatible with your WordPress version, PHP version or with another required plugin, this will create an error log entry every single time that plugin is called. For a smaller site, the impact of this is minimal, but on a site that sees hundreds or thousands of visitors a day, the increased log entries will quickly add up.
- Avoid using debug mode for long periods of time
While debug mode can be very helpful for troubleshooting those strange plugin clashes, it also generates an enormous number of log entries. Debug mode is designed for short term usage and should be turned off unless you are directly troubleshooting an issue.
Email Usage
Now that we've covered the various site files that can lead to an overinflated disk usage, its time to cover one of the worst offenders...emails.
Like a freshly planted flower bed, email accounts start off small and organised and every email will generally add only a few KB to your overall disk usage, but if not regularly maintained and pruned, over time your plants may become overgrown and full of weeds.
With email accounts, this can lead to accounts that are in the 10's of gigabytes without you even noticing!
Again, we have a handy cPanel tool that can help us not only identify individual accounts that may have unusually high usage, but we can also purge these without the mundane task of going through potentially thousands of messages and individually marking these to be deleted.
Before we get into the how, its worth taking some time to cover the why.
Beyond keeping within your hosting account storage limits, every email contributes to your carbon footprint. (External link opens in a new tab)
...some people have estimated that their own emails will generate 1.6kg (3.5lb) CO2e in a single day. Berners-Lee himself also calculated that a typical business user creates 135kg (298lbs) CO2e from sending emails every year, which is the equivalent of driving 200 miles in a family car.
While keeping our Digital garden organised and clutter free is good for our websites and businesses, every positive step towards reducing our storage requirements also helps our planet.
Using the cPanel email usage tool
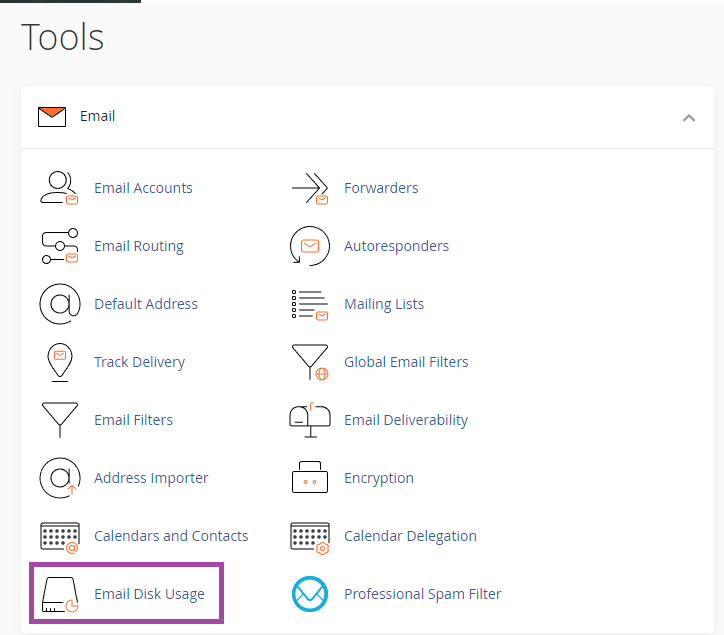
From within cPanel, navigate to the emails header, then click the Email Disk Usage option.
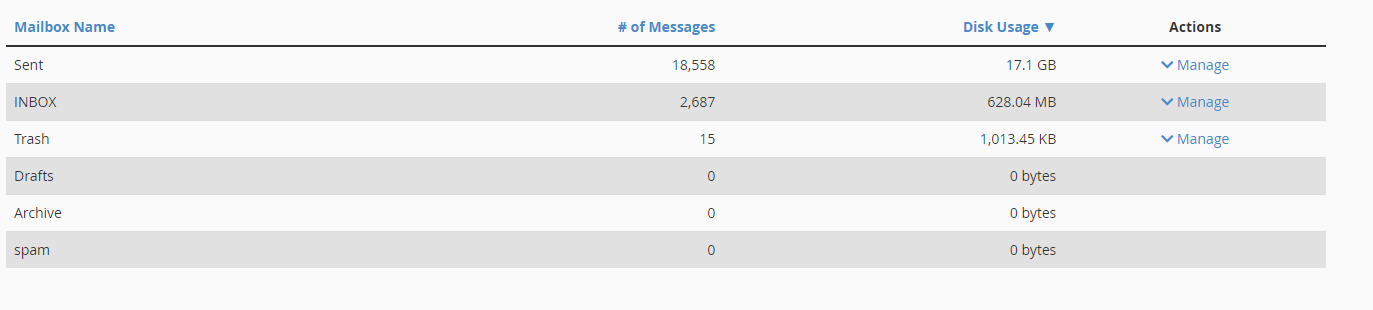
From here, you can select the individual account using the dropdown.

This will allow you to see a breakdown of the space used by each folder.
We can then manage each of these folders individually by selecting the Manage option.
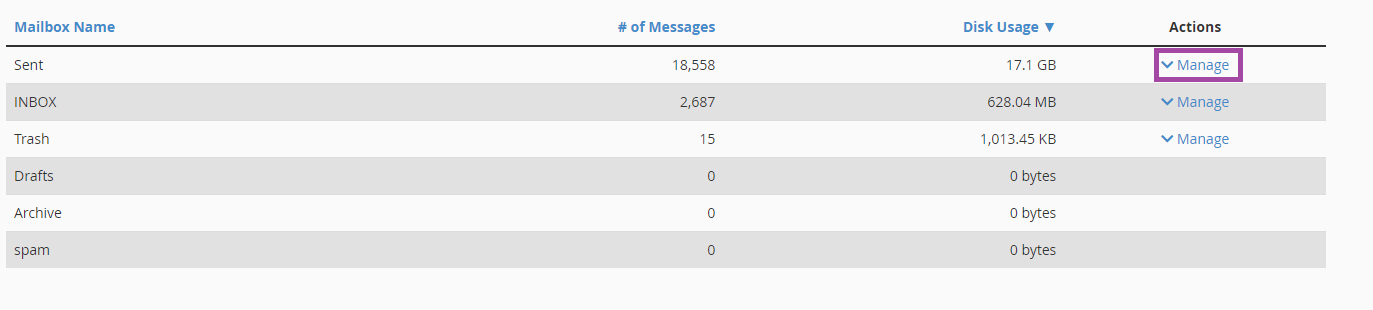
This gives us access to powerful tools to automatically purge our emails. The default options include:
- Removing emails over 1 year old
- Removing emails over 30MB in size
- Removing any previously viewed messages
- Clearing the entire folder

You can also create custom queries to ensure that you are only removing mail that you no longer need access to.
After selecting one of the options, just click on Delete Permanently to delete the emails.